Setting Up SSO SAML 2.0 With Azure AD
Introduction
This article explains how to set up SAML 2.0 integration between Sisense and Azure AD.
For more information about SSO in Sisense see
For more information about SSO in Sisense see
By default, Sisense supports Forms Authentication only. Starting from the L2021.11 version, you can also enable support for Windows Authentication and MFA. For more details, contact the Sisense support team.
Configuration on Azure side
- Log in to your Azure account.
- Expand the left-hand menu:

- Go to Azure Active Directory

- Select Enterprise applications:

- Under the All Applications section, select New application:

- Create your own application for ‘Integrate any other application you don’t find in the gallery’ purpose, name it Sisense:

- Under Overview > Assign users and groups, configure access permissions for your SSO integration. Once configured, go back to Overview and switch to Set up single sign-on:

- Select SAML type of the SSO:

- Edit Basic SAML Configuration with the following settings:
|
Name
|
Value
|
|---|---|
|
Identifier (Entity ID)
|
Sisense
|
|
Reply URL
(Assertion Consumer Service URL) |
https://my.sisense.com/api/v1/authentication/login_saml_callback/
* replace my.sisense.com with your Sisense URL |
Note
Azure allows HTTPS format only for Reply URL. To configure HTTPS in Sisense, see Setting Up SSL for Sisense.
If you configure the integration in the Sisense test environment without SSL, you can set HTTP reply URL directly in the manifest of the SAML application, reference.
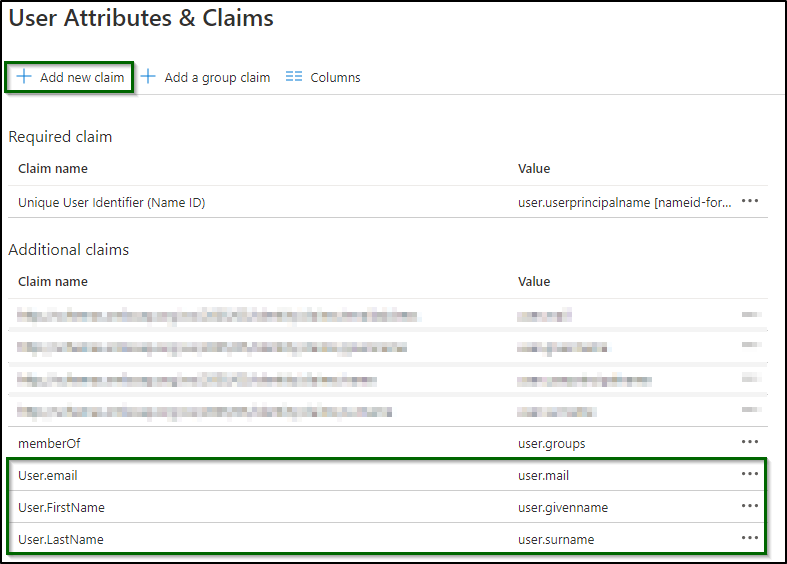
 Once saved, go to Edit User Attributes and claims.
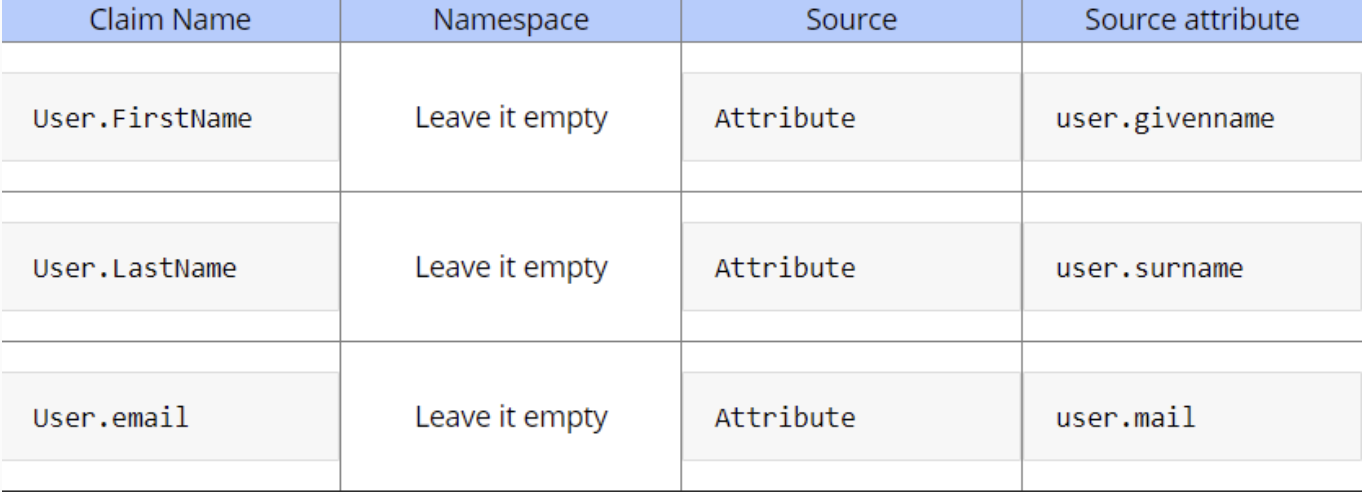
10. Use Add New Claim to add the following attributes
 11. Optional. Add a New Group Claim as per screenshot:
Your Azure AD needs to be synchronized with on-premise Microsoft Active Directory to use this claim. See more details in Configure group claims for applications with Azure Active Directory.
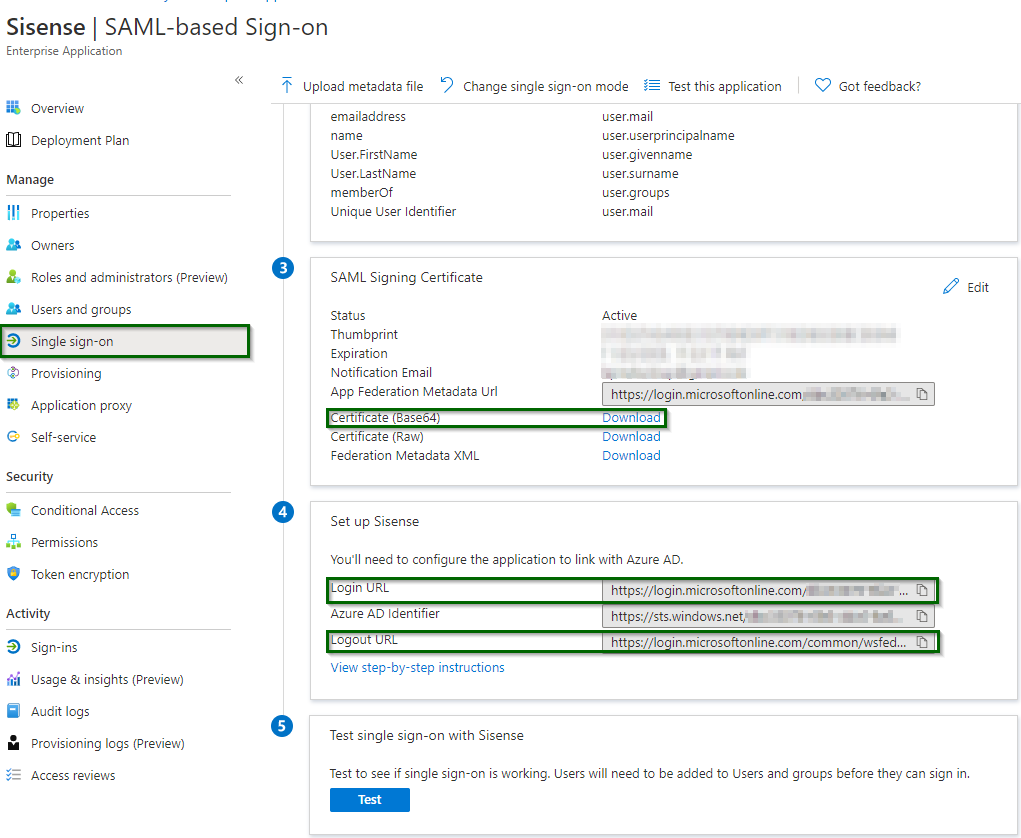
12. Return back to the Single Sign-On page and copy the following parameters:
Azure AD additional info
In the latest versions of Sisense, it is required to fill the Relay State field in, it is marked as optional at provider side:

RelayState is a parameter that identifies a specified destination URL your users will access after signing in with SSO. In case of Sisense, it could be a path to the main page: “https://my.sisense.com/app/main#/home”
Configuration on Sisense side
- Go to Admin tab > Single-Sign On.
- Select SAML, turn the toggle on. Use parameters from Step 12 above:
- Remote Login URL = Login URL
- Remote Logout URL = Logout URL
- Public X.509 Certificate = Content of Certificate (Base 64) file (you can open it with a text editor)

3. Configure claim names according to your config in Azure AD. If you created a group claim in Azure SAML app, choose Define by Group and enter memberOf as the Group Claim name.

Updated 02-16-2024
intapiuser
Admin
Joined December 15, 2022