Reverse Proxy with Nginx + SSL configuration
Reverse Proxy with Nginx + SSL configuration Nginx Reverse proxy configuration Step 1. Nginx reverse proxy server set up In this example, we are using nginx, we can install it on the same device as Sisense. To install it run 1. Install nginx for Ubuntu/Debian-like systems: sudo apt install nginx 2. For RHEL systems such a CentOS, use below: sudo yum install nginx 3. Start nginx: sudo systemctl start nginx Step 2. Nginx server configuration 1. Open the browser and go to the IP address of the server. If it's up, you will see the Nginx welcome page– this means nginx is now running on the default port 80. 2. Edit /etc/nginx/sites-enabled/default and add the next configuration under the root server config. Define correct Sisense public IP, and port in the "server {}" section: location /analytics { rewrite /analytics/(.*) /$1 break; proxy_pass http://<sisense-ip>:30845; proxy_http_version 1.1; proxy_set_header X-Forwarded-Proto $scheme; proxy_set_header Upgrade $http_upgrade; proxy_set_header Connection "upgrade"; proxy_set_header X-Real-IP $remote_addr; proxy_set_header X-Forwarded-For $remote_addr; proxy_set_header X-Forwarded-Proto $scheme; proxy_set_header Host $host; proxy_connect_timeout 36000; proxy_send_timeout 36000; proxy_read_timeout 36000; send_timeout 36000; } 3. Before you apply the settings, check that there is no syntax issue by running sudo nginx -t 4. Reload nginx with sudo /etc/init.d/nginx reload or sudo systemctl reload nginx With this configuration, Sisense will be accessed with http://<ip-or-domain-of-nginx-server>/analytics. Also if the https is configured for this nginx server, Sisense would be accessible with https://<ip-or-domain-of-nginx-server>/analytics. If on the proxy level, the HTTPS is enabled, please ensure the application_dns_name has the https prefix to ensure all traffic is used, so something like: application_dns_name: https://company.sisense.com Step 3. Sisense configuration Go to the Admin tab Click on System Management Enter Configuration and choose Web Server In the Proxy URL enter "/analytics" or "http://<ip-or-domain-of-nginx-server>/analytics" as we configured in Nginx. With "/analytics" you will be able to use multiple domains for this instance. Save it and test with a browser by entering http://<ip-or-domain-of-nginx-server>/analytics And now we can configure SSL with our Nginx server, please validate that Nginx is working properly first before moving on. SSL configuration for Nginx Step 1. Obtain self signed SSL certificates You can use a command like this sudo openssl req -x509 -nodes -days 365 -newkey rsa:2048 -keyout /etc/ssl/private/nginx-selfsigned.key -out /etc/ssl/certs/nginx-selfsigned.crt. For an explanation of what the above command does please refer to Setup SSL on Sisense (Linux version) - Link placeholder Step 2. Configure Nginx to use SSL 1. Сreate a new file named self-signed.conf. sudo vi /etc/nginx/snippets/self-signed.conf In self-signed.conf we want to add some variables that will hold the location of our certificate and key files that we generated in Step 1. Like this ssl_certificate /etc/ssl/certs/nginx-selfsigned.crt; ssl_certificate_key /etc/ssl/private/nginx-selfsigned.key; Save and close the file. 2. Now we will create a snippet file to define SSL settings. Start by creating a file like this sudo vi /etc/nginx/snippets/ssl-params.conf In this file, we need to include some SSL settings as below. ssl_protocols TLSv1.3; ssl_prefer_server_ciphers on; ssl_dhparam /etc/nginx/dhparam.pem; ssl_ciphers EECDH+AESGCM:EDH+AESGCM; ssl_ecdh_curve secp384r1; ssl_session_timeout 10m; ssl_session_cache shared:SSL:10m; ssl_session_tickets off; ssl_stapling on; ssl_stapling_verify on; resolver 8.8.8.8 8.8.4.4 valid=300s; resolver_timeout 5s; # Disable strict transport security for now. You can uncomment the following # line if you understand the implications. #add_header Strict-Transport-Security "max-age=63072000; includeSubDomains; preload"; add_header X-Frame-Options DENY; add_header X-Content-Type-Options nosniff; add_header X-XSS-Protection "1; mode=block"; Save and close the file. 3. In this step, we need to modify the Nginx configuration to use SSL. Open up your Nginx configuration file which is usually in a location like /etc/nginx/sites-available/<yourconfig>. Before making changes to this file it is best to back it up first in case we break anything. sudo cp /etc/nginx/sites-available/yourconfig /etc/nginx/sites-available/yourconfig.bak And now we open up our current Nginx config file; vi /etc/nginx/sites-available/<yourconfig> In the first server{} block, at the beginning, add the lines below. You might already have a location {} block so leave that there server { listen 443 ssl; listen [::]:443 ssl; include snippets/self-signed.conf; include snippets/ssl-params.conf; server_name your_domain.com www.your_domain.com; //server_name can be anything location / { try_files $uri $uri/ =404; } } Lastly, we need to add another server{} block at the very bottom of the file, with the following parameters. This is a configuration that listens on port 80 and performs the redirect to HTTPS. server { listen 80; listen [::]:80; server_name default.local www.default.local; //use same name return 302 https://$server_name$request_uri; } Please note that you must add this server_name to your local desktop or laptop hosts file. In this example, I will go to my local laptop or desktop hosts file and add <ip address of nginx server> <space> <default.local> [Optional] Step 3. Adjust the firewall The steps below assume you have a UFW firewall enabled. You need to review available profiles by running sudo ufw app list You can check the current setting by typing sudo ufw status: Output Status: active To Action From -- ------ ---- Nginx HTTP DENY Anywhere Nginx HTTP (v6) DENY Anywhere (v6) We need to allow HTTPS traffic, so update permissions for the “Nginx Full” profile. sudo ufw allow 'Nginx Full' Check the update sudo ufw status Output Status: active To Action From -- ------ ---- Nginx Full ALLOW Anywhere Nginx Full (v6) ALLOW Anywhere (v6) This output above confirms the changes made to your firewall were successful. So you are ready to enable the changes in Nginx. Step 4. Enable to changes in Nginx First, check that there are no syntax errors in the files. Run sudo nginx -t The output will most likely look like Output nginx: [warn] "ssl_stapling" ignored, issuer certificate not found for certificate "/etc/ssl/certs/nginx-selfsigned.crt" nginx: the configuration file /etc/nginx/nginx.conf syntax is ok nginx: configuration file /etc/nginx/nginx.conf test is successful You can disregard the ssl_stapling warning, this particular setting generates a warning since your self-signed certificate can’t use SSL stapling. This is expected and your server can still encrypt connections correctly. If your output matches the out example above, that confirms your configuration file has no errors. If this is true, then you can safely restart Nginx to implement the changes: sudo systemctl restart nginx Step 5. Test the encryption Open up a browser and navigate to https://<server_name>, use the name you set up in Step 2C. Additional information 1. It was reported that File Manager and Grafana doesn't work with reverse proxy. To get the URLs for file manager and grafana to work, following steps should be taken: kubectl -n sisense set env deploy/filebrowser FILEBROWSER_BASEURL='/<baseurl>/app/explore' kubectl -n sisense set env deploy/filebrowser FB_BASEURL='/<baseurl>/app/explore/' kubectl -n sisense set env deploy/sisense-grafana GF_SERVER_ROOT_URL=<baseurl>/app/grafana 2. Once the reverse proxy is enabled, Sisense will still utilize IP addresses as links in their email communications. To setup correct addresses in Sisense e-mails after reverse proxy is configured: in the configuration yaml file set: update: true application_dns_name: "" and start the installation script to update parameters. After update is completed, in Sisense GUI go to Admin -> Server & Hardware -> System management -> Configuration Set the http://YOUR_PROXY_ADDRESS/analytics in the "Proxy URL" field of "Web Server" menu (or https://YOUR_PROXY_ADDRESS/analytics in case of SSL) Go to Admin -> User Management -> Users Try creating a new user or use the "Resend invitation" option for the existing one (if available) Check the inbox of that user for "Sisense account activation" The "Activate Account" link should now redirect to the http://YOUR_PROXY_ADDRESS/analytics/app/account/activate/HASH address25KViews1like4Comments
Assessing the Quality of Your Dashboard
Introduction The following article discusses how to assess the quality and adoption of your dashboard. Table of Contents How to Measure a Dashboard's Quality? Let's begin by defining what a "Good Dashboard" is. To assess the quality of your dashboard, you should measure the following aspects: Is the dashboard practical? Does it serve its purpose? Does the dashboard display relevant and correct information? Is the information in the dashboard displayed correctly? Was the dashboard adopted by the end-users? Is the dashboard intuitive for use? Planning Makes Perfect Correct dashboard planning is the key to its success! I recommend you read this article discussing a dashboard's (high-level) development cycle. It breaks the process into easy measurable steps that start from the initial KPI planning to maintaining and adjusting your end product. Reading through it might help identify flaws during the dashboard's initial rollout process. Assessing a Dashboard's Quality The "Practical" Test The practicality of a dashboard focuses on whether the dashboard serves its purpose. Going back to a dashboard's planning phase, try to recall the reason for building this dashboard. What were the end-users looking to achieve? What insight were they seeking? Possible answers are: Monitoring a person's or a group's achievements Monitoring a measurable process Help decide what to do next based on historical information Assess future steps in various scenarios (What-If Analysis) A good dashboard: Answers its purpose! How to Test This? To check whether your dashboard is practical, you should: Set up a call with one (or more) end-users and/or stakeholders using the dashboard Ask them whether they can make the intended decision based on it If they are - What is the process of making the decision? If they aren't - What are the obstacles that stand in the way of making it? (e.g., missing/incorrect data, bad user experience, etc.) Next, revisit the dashboard's goals: What question should it answer? What action can the users make based on it? Compare the information you got from your stakeholders and the plan made when designing the dashboard - Define the gaps. How to Resolve This Type of Issue? Work towards re-planning your dashboard to meet its goals. Focus on: Aligning the "Call for Action" Redefining the KPIs and the user story Redesigning and restructuring the KPIs Optimizing/adjusting the data model to be able to answer the different KPIs Resolving this type of issue will most likely require a complete dashboard redesign, followed by an entire UAT cycle. The "Data Relevance" Test The term "Data Relevance" breaks into two aspects: Am I displaying relevant data - Considering the audience of the dashboard? Am I displaying relevant data - Considering the decision to be made? Does It Address the Right Crowd? Like any deliverable, one of the fundamental things to know is its audience. The answer to this question will affect the following: The type of dashboard you create The granularity of data you present The way information is presented A good dashboard: Is built with the right audience in mind. Does it Contain the Right Amount of Data? Making a decision requires having the right amount of data: Too little data - Could prevent the person from making the right call. Too much data - Could confuse the person and throw them off-track. A good dashboard: Has the right amount of data required to serve its purpose. How to Test This? To check whether your dashboard has relevant data, you'll have to: Assess who are the end-users and/or stakeholders using this dashboard Set up a call with one (or more) end-users and/or stakeholders using it Ask them what the process of making their decision is? Check whether the information they require is presented in the dashboard. Check whether the dashboard has redundant or irrelevant data. How to Resolve This Type of Issue? Incorrect Dashboard Type Check your dashboard's type - Based on the person using this dashboard, should it be operational, analytical, tactical, or strategic? Compare the dashboard type to the intended crowd to determine if it was designed correctly (for example, a "Tactical Dashboard" is aimed towards upper management and will usually present long-term KPIs and high-level metrics). Resolving this type of issue will most likely require a complete dashboard redesign, followed by an entire UAT cycle. Missing/Redundant Information If you've identified that certain information is redundant or missing, consider adding, modifying, or removing widgets from the dashboard. Doing so might be a simple task (especially when removing data). However, it might also end up as a more extensive project requiring a partial redesign of the dashboard and a partial/complete UAT cycle. The "Data Correctness" Test Presenting inaccurate or outdated data is worse than displaying partial or excessive data. Two possible outcomes of stakeholders, basing their decisions on incorrect data, are: Experiencing negative events (such as revenue loss) Compromising the trust relationship between Sisense and the end-users Frequent causes for showing outdated data in your dashboard include: An ETL process that is not run frequently enough An ETL process that often/occasionally fails An ETL process using an incorrect table update behavior (e.g., "Accumulative" where it should be "Full") An ETL process that isn't synchronized with your Data Warehouse A source database being offline for an extended period Frequent causes for showing incorrect data in your dashboard: Wrong data modeling leading to unexpected Many-to-Many relationships Business questions that don't align with the data model (e.g., causing "Random Paths") Unexpected / Missing inheritance of filters Wrong data security configuration The use of multiple data models (in the same dashboard) built at different schedules A good dashboard: Displays precise and up-to-date data How to Test This? To check whether your dashboard has correct data, you'll have to: Assess the different widgets on the dashboard to see the granularity of data displayed For each widget, check what data model it relies on - Use the Usage Analytics "Usage - Builds" dashboard to monitor the behavior of historical builds. Set up a call with one (or more) end-users and/or stakeholders using this dashboard Ask them if they trust the data on the dashboard and if the data refresh frequency is sufficient. How to Resolve This Type of Issue? Showing Outdated Data Ask your stakeholder how frequently they expect the data to be refreshed. Perform the following actions: Check the data model's build frequency - Should the build frequency be modified? Check the build time - Should the data model be optimized? Is the data model too heavy? Check the build success rate - Why are builds failing? Is the system running low on resources? Should "Data Groups" be applied? If using a Data Warehouse (DWH) and an Elasticube - Check the DWH build frequency; Check the synchronization between the DWH ETL finish and the Sisense ETL beginning. If you can't achieve the required build frequency, check whether all widgets require the same data refresh rate - Can a "Live Model" or a "Hybrid Dashboard" be considered? Showing Incorrect Information Ask a stakeholder to generate a report with correct data or ask them to point you to "defective widgets." Perform the following actions: Check the formula behind the figure(s) showing the incorrect data and correct them. Consider the different filters, inheritance behavior, etc. Examine the query path used to calculate each figure (look out for unexpected "Many-to-Many relationships" or "Random Paths") - Use the "Visualize Queries" add-on (Link) to compare Sisense behavior against the expected query path. Run the calculation in the data model using a custom table and a SQL statement that emulates the dashboard's calculation. The "Visual Correctness" Test Data alone isn't enough; it must be visualized correctly. Visualizing data requires using the correct widget type and visual aids to convey the message. For example, say a KPI is showing the company's revenue. See the different visualization options below: Option #1 Option #2 Option #3 Transitioning from option #1 to #2 provides an added value of "Good" / "Bad" Transitioning from option #2 to #3 provides an added value of revenue ranges A good dashboard: Has widgets that are visualized correctly and convey a clear message. How to Test This? To check whether your widgets are visualized correctly, you'll have to analyze each widget individually: Categorize each widget to find out its aim (e.g., show a single figure, compare values, show behavior over time, visualize data to show distribution, etc.) Verify the visualization matches the widget type (e.g., An indicator widget is perfect for displaying a single figure, a line chart is ideal for showing a behavior over time, etc.) Make sure each widget has visual aids (such as conditional formatting) to convey its message clearly - Each widget should tell a small puzzle of the story (which the dashboard should put together to a larger picture) Set up a call with people who are not familiar with the dashboard Ask them to describe each widget (separately) and their conclusion from looking at it. How to Resolve This Type of Issue? Wrong Widget Type Resolve the issue by fixing the visualization type - Use the following chart to help out: Type Use Case Indicator Show a single figure (numerical) Show a single figure and a gauge representing its range Column Chart Show a comparison among different sets of data Track data sets over time Track individual values + Their sum (stacking) Bar Chart Compare many items Track individual values + Their sum (stacking) Line Chart Reveal trends, progress, or changes that occur over time The data set is continuous rather than full of starts and stops Area Chart Displaying absolute or relative (stacked) values over a time period Analyzing a Part-to-whole Relationship Pie Chart One static number, divided into categories that constitute Represent numerical amounts in percentages Table Display RAW granular data Pivot Display RAW granular data Display aggregative data in a table format Scatter Plot Comparing large numbers of data points without regard to time Identify a potential relationship between two variables Calendar Heatmap Show relative number of events for each day in a calendar view Missing Visual Aids Visual aids help the end-users identify "Good" or "Bad" values. Possible visual aids include: Adding colors to numerical labels (e.g., Green figure vs. a red one) Adding background colors to table cells (e.g., Color negative cells red) Adding a line chart representing a threshold (e.g., A red line to indicate a lower threshold) Converting numerical values with text (e.g., Showing a "Revenue increased" label rather than a positive figure) Adding trend lines Adding a forecast range The "Intuitiveness" Test Dashboard intuitiveness refers to the ability of a non-technical person to: Access the dashboard Understand and conclude the dashboard Understand how to customize the dashboard (using filters, drilling, etc.) Easy Access to Data There are two methods of accessing a dashboard: Sisense offers a complete HTML5 platform (a.k.a. Sisense Web Application) that can be white-labeled and customized to meet the company's look & feel (i.e., color pallet, logo, links to internal support and documentation pages, etc.). Sisense offers three different embedding deployment options (conventional iFrames, an embedding SDK, and a complete JS-based embedding solution). Embedding the dashboard (or individual widgets) allows infusing analytics into web pages and applications. Choosing the proper access method will affect how end-users access data and benefit the BI solution. To improve intuitiveness - Make sure to streamline the process of consuming data as much as possible. The need to switch between multiple applications will result in a lack of efficiency, a complex adoption, or even a lack of adoption. Ease of Comprehension The comprehension of individual widgets was discussed earlier. However, is "the whole" greater than the sum of the parts? Does the dashboard tell a story? An excellent example for a dashboard: Widget #1 shows the revenue is low. Widget #2 shows a revenue breakdown per department and points out one department losing money. Widget #3 provides an income/expanse category breakdown and points out non-proportional marketing expenses. Widget #4 provides a detailed transactional income/expanse breakdown and points out the individual expenses Customizability and Interactivity Stale reports tell one story. However, a person looking at the dashboard may want to filter, sort, and pivot the data to tell the same story about a specific segment or individual. The tools for customizing/interacting with a dashboard include: Filtering data to a specific segment of interest (Link) Drilling into a measure to be able to extract more information about it (Link) Adding explanations (Link) and narratives (Link) A good dashboard: Is easy to access, self-explanatory, easy to customize, and play around with. How to Test This? To check whether your dashboard is interactive, you'll have to: Set up a call with one (or more) end-users and/or stakeholders using it Ask them when they use this dashboard and their workflow of consuming its information (e.g., A customer requires the data when building a financial report, and his workflow includes opening another browser tab and logging into the Sisense Web Application). Open the dashboard and ask them to explain it. Try to identify widgets that were over-explained and widgets they skipped. Track the questions you have to ask to understand what you see. Track the amount of "mouse scrolling" they perform when explaining the dashboard flow. Ask them what interaction they have with their dashboard and lay out the tools to increase interaction. Note the tools they are interested in (e.g., extra filters, adding narratives to widgets, etc.) How to Resolve This Type of Issue? Data is Hard to Access Ease of access is easy to measure - Count the number of clicks the user has to make when they want to consume the data in this dashboard - Fewer clicks = Easier to access. If data is hard to access or requires too much "Clicking around": Integrate SSO or WAT to prevent the user from logging in to the Sisense Web Application Embed the dashboard (or a single widget) into the application/webpage Have additional data imported to Sienese - Allowing the user to have a "One Stop Shop" for their entire workflow Enable sending periodic reports to the user's email Enable NLQ to allow the user to interact with Sisense easily (Link) Infuse data into G-Suite applications (Link) Enable Pulse alerts to send push notifications to the user (Link) Data is Hard to Comprehend If your widgets tell the right story, but the complete picture doesn't make sense: Move widgets around to make the story clearer Add visual separators between certain widgets (requires scripting) Reduce the number of widgets by splitting your dashboard into multiple stand-alone dashboards Use add-ons to simplify dashboard navigation (e.g., Accordion) Bring in a UI/UX designer to help visualize correctly Redesign the dashboard to avoid scrolling the mouse The Dashboard isn't Customizable / Interactive Make the dashboard more customizable by allowing the user to: Filter data based on predefined filters Define hierarchies to make filtering more intuitive Integrate filtering abilities into the dashboard (e.g., BloX buttons, drilling options, clickable widget values) Add additional widgets (e.g., Accordion, Switchable Dimensions, Tabber, etc.) Add premium widgets (e.g., Advanced Input Parameters - Link) The "Adoption" Test So you've created a great dashboard; it has all the correct data and visualizations, a person can access it quickly and draw the proper conclusion by just looking at it, but it wasn't adopted. Has the company done enough to drive its adoption (e.g., sufficient training, decommissioning the old dashboard, integrating it into the users' application, etc.)? A good dashboard: Is measured by its adoption and usage. How to Test This? To check whether your dashboard has correct data, you'll have to: Find out who this dashboard's audience is Use the Usage Analytics "Usage - Dashboards" dashboard to monitor who accesses this dashboard and how often. Set up a call with one (or more) end-users and/or stakeholders who are not using this dashboard Find out why this dashboard isn't being used. Find out what alternative ways they use to collect the data How to Resolve This Type of Issue? Once you're sure the dashboard is perfect and the only thing missing is adoption: Involve users in the design meetings and UAT loop to make them feel they are part of the process Create an adoption plan! Get executives to buy-in - Causing them to promote their usage Monitor what people are using the dashboard and which aren't - Target the right people Reeducate your end-users on the benefits of the dashboard and the value of using it Decommission old dashboards and reports Refresh your dashboards from time to time (design, contents, etc.)5.5KViews7likes2CommentsSisense.js Demo with Filter and Dashboard Changing with Native Web Components
This is a Sisense.js Demo built with React, which includes functionality such as changing filters and dashboards with native web components. This can be used as a reference or starting point for building and customizing Sisense.js applications with custom styling and functionality. React Sisense.js Demo Getting Started Make sure CORS is enabled and the location/port your hosting this applicaiton on is whitelisted on Sisense instance, documentation on changing CORS settings is here. Open the terminal (on Mac/Linux search for terminal, on Windows search for Powershell, Command Prompt, or Windows Subsystem for Linux if installed ) and set path to folder containing project (using cd command). Open the config file in the folder src folder and set Sisense Server URL to the IP or domain name of your Sisense server and set the dashboard id's and optionally filters keys. Run the command. npm install && npm start If npm and node is not installed, install them using the package manager or using nvm (Node version manager). Nvm can be installed by running this command in a terminal curl -o- https://raw.githubusercontent.com/nvm-sh/nvm/v0.38.0/install.sh | bash Once install script is finished, follow any instructions listed in terminal, restart or open a new terminal and run these command to install node and npm: nvm install node nvm install-latest-npm To start hosting the site, run this command: npm install && npm start The default location is IP of hosting server on port 3000. If the IP address of the server hosting this program is 10.50.74.149 for example, then enter 10.50.74.149:3000 in the address bar of a browser to view application. if hosted locally enter your ip on port 3000 or enter localhost:3000 To use a different port, set the port variable in terminal using this command: export PORT=NEW_PORT_NUMBER and then run npm start. To run in the background use PM2 or system. Requirements Npm (and Node) - Installs all requirements Access to a Sisense instance Description This is a demonstration of some of the capabilities of Sisense.js and Sisense. It is a React single-page application using Typescript that can switch between multiple dashboards, loading all widgets in those dashboards to individual elements (created on dashboard switch). Multiple dashboard filters can be changed (and multiple members in a filter) using a native React dropdown bar to filter the data with the new filtered data visualized with the widgets in the dashboard. Changes made to filters using widgets in Sisense.js using right click are reflected in dropdown filter. Connecting to Sisense // Loads Sisense.js from Server, saves Sisense App copy in window as object to indicate already loaded to prevent loading twice const loadSisense = () => { // If Sisense is already loaded stop if (window.sisenseAppObject) { return; } // Loads sisense app object into app variable, edits being saved to dashboard set to false window.Sisense.connect(config.SisenseUrl, config.saveEdits) // Sisense app object .then((app: SisenseAppObject) => { // loads Sisense app object into window object, so connect is only run once, alternative is export and import window.sisenseAppObject = app; // Calls loadDashboard after Sisense is connected, uses initial widget and dashboard variables loadDashboard(config.DashboardConfig[0].DashboardID, config.DashboardConfig[0].DimArray); }) // error catching and log in console .catch((e: Error) => { console.error(e); }); } Loading Dashboard and Creating Container Element for each Widget // Function to load dashboard taking dashboard id as parameter to load dashboard. Every widget in dashboard is rendered into an element created in loop, looks for parent element with ID 'widgets'. On calling again existing widgets are replaced by new ones. const loadDashboard = (dashboardID: string = '') => { // if empty dashboard id return if (dashboardID === '') { return; } // load dashboard into being active dashboard window.sisenseAppObject.dashboards.load(dashboardID) // after load dashboard is in dash variable .then((dash: DashObject) => { window.currentDashObject = dash // array of loaded widgets // let widgetArray: Array<String> = prism.activeDashboard.widgets.toArray().map( let widgetArray: Array<String> = dash.$$widgets.$$widgets.map( function (widget: Widget) { // widget id for loading return widget.id } ); // set state with loaded dashboard if prism loaded if (widgetArray.length > 0) { this.setState((state, props) => { return { dashboardID: dash.id, }; }); } // get widgets element let widgetsElement: HTMLElement | null = document.getElementById(`widgets`); // type checking if (widgetsElement === null) { return; } // erase previous widgets widgetsElement.innerHTML = ''; // loop through array of widget arrays, loads them into containers by id with first in widget1, second in widget2 and so on widgetArray.forEach((widget, index) => { // check if they exist, type checking if (widgetsElement === null) { return; } // element to load widget into later let widgetElement: HTMLElement | null = document.createElement("div"); // Class included index for widget rendering later widgetElement.classList.add(`widget${index + 1}`, 'widget') // add empty div to widgets parent div widgetsElement.appendChild(widgetElement) // get widget and filter elements by ID let filterElement: HTMLElement | null = document.getElementById("filters"); // check if they exist, type checking if (widgetElement === null || filterElement === null) { return; } // Clear widget and filter elements from previous render filterElement.innerHTML = ''; // put widget in container element dash.widgets.get(widget).container = widgetElement; // Renders filter in HTML element with id of filters dash.renderFilters(filterElement); // reloads and refresh dashboard }); dash.refresh(); }) // error catching and log in console .catch((e: Error) => { console.error(e); }); } Changing a Dashboard Filter // Change a dashboard filter, takes dim to filter by, and new values in filter. const changeDashboardFilter = (dashboard: dashboard, dim: string, newFilterArray: Array<String>) => { // Find matching filter and to make changes to let filterToChange = dashboard.filters.$$filters.find(item => item.jaql.dim === `[${dim}]`); // If filter is undefined create a new filter if (filterToChange === undefined) { // Create the filter options let filterOptions = { // Save to dashboard save: false, // Refresh on change refresh: true, // If filter already used, make changes to that filter instead of creating new ones unionIfSameDimensionAndSameType: true }; // Create the jaql for the filter let jaql = { 'datatype': 'text', 'dim': dim, 'filter': { // Multiple items can be selected 'multiSelection': true, // New filter items 'members': newFilterArray, 'explicit': true }, }; // Create the filter jaql object let applyJaql = { jaql: jaql }; // Set the new filter using update function dashboard.$$model.filters.update(applyJaql, filterOptions); } if (filterToChange && filterToChange.$$model.jaql.filter) { let members = filterToChange.$$model.jaql.filter.members; // Check if members exist if (members !== undefined) { // Set members to new selected filter filterToChange.$$model.jaql.filter.members = newFilterArray; // Save the dashboard // dashboard.$$model.$dashboard.updateDashboard(dashboard.currentDashObject.$$model, "filters"); dashboard.filters.update(filterToChange, { refresh: true, save: false }); // Refresh the dashboard // dashboard.refresh(); } } } Clearing a filter Clearing a filter is done by simply setting the members to an empty array, which disables the filter. changeFilter([]); Monitor For Filter Change to Ensure Dropdown Accurately Displays Filter Change // Watch for element change to indicate filter changes and make change to dropdown if filters don't match displayed filter in dropdown const watchForFilterChange = new MutationObserver((mutations) => { // If element changes mutations.forEach(mu => { // If not class or attribute change return if (mu.type !== "attributes" && mu.attributeName !== "class") return; // Find matching Filter to dropdown let filterToChange = (dashboard.filters.$$filters as Array<DashObject>).filter(element => element.jaql.dim === `[${dim}]`); // If filter values displayed and filter values active don't match each other, set displayed filter to match filter, filter value stays as is filterToChange.forEach((filter) => { if (filter.jaql.filter.members.sort().join(',') !== selectedFilterValues.sort().join(',')) { // Change state of filter values to new filter, sets displayed filter in dropdown in correct one. setSelectedFilterValues(filter.jaql.filter.members); } }); }); }); // Array of element with 'widget-body' class (created by Sisense.js on widgets) for change to check for filter change const widget_body_array = document.querySelectorAll(".widget-body") // Watch 'widget-body' class for filter changed by other means, such as right click select on value widget_body_array.forEach(el => watchForFilterChange.observe(el, { attributes: true })); Component Details Filter - One for each filter, gets dropdown values and other props for dropdown filter component, takes filter dim as prop, parent of Dropdown Filter component Dropdown Filter - Renders individual filter dropdown, renders dropdown of one filter, handles filter changes Clickable Button - Button that calls a function on click, props include text, color and function called Input Number - Sets widgets per row, has up and down button as well as keyboard input, controlled input only accepts numbers, has default value in config file Load Sisense - Loads Sisense, gets URL of server from config file, has load dashboard function, creates elements to load widgets into on dashboard load call Sidebar - Collapsible Sidebar, on click loads dashboard, content of dashboard can be configured by config file App - Parent component, has loading indicator before Sisense has loaded, contains all other components Config Settings DashboardConfig - Array of objects describing dashboards selectable in sidebar DashboardLabel - text to show in expanded sidebar DashboardID - Dashboard ID, get from url of dashboard in native Sisense Icon - Icon to show in sidebar for dashboard DimArray - Values to filter by SisenseUrl - URL of Sisense server initialDashboardCube - Title of initial dashboard to show defaultSidebarCollapsed - Dashboard initial state, collapsed or not defaultSidebarCollapsedMobile - Dashboard initial state, collapsed or not, on mobile collapseSideBarText - Text shown on element that collapses sidebar* hideFilterNativeText - Text to hide native embedded filter useV1 - Use v1 version of Sisense script defaultWidth - initial state of selector for widgets per row saveEdits - Write back to Sisense changes made to filters, and any other persistent changes loadingIndicatorColor - Color of loading indicator loadingIndicatorType - Type of loading indicator, options from ReactLoading sidebarBackgroundColor - Background color of sidebar widgetMargin - Margin of individual widget Available Scripts In the project directory, you can run: npm start Runs the app in the development mode. Open http://localhost:3000 to view it in the browser. The page will reload if you make edits. You will also see any lint errors in the console. npm test Launches the test runner in the interactive watch mode. See the section about running tests for more information. npm run build Builds the app for production to the build folder. It correctly bundles React in production mode and optimizes the build for the best performance. The build is minified and the filenames include the hashes. Your app is ready to be deployed! See the section about deployment for more information. npm run eject Note: this is a one-way operation. Once you eject, you can’t go back! If you aren’t satisfied with the build tool and configuration choices, you can eject at any time. This command will remove the single-build dependency from your project. Instead, it will copy all the configuration files and the transitive dependencies (webpack, Babel, ESLint, etc) right into your project so you have full control over them. All of the commands except eject will still work, but they will point to the copied scripts so you can tweak them. At this point, you’re on your own. You don’t have to ever use eject. The curated feature set is suitable for small and middle deployments, and you shouldn’t feel obligated to use this feature. However, we understand that this tool wouldn’t be useful if you couldn’t customize it when you are ready for it. Download and extract the zip below:5.3KViews5likes0Comments
Format Seconds to Time (HH:MM:SS) in a Pivot Table
This article will explain how to convert seconds into date-time format on a pivot table. 1. Ensure your seconds column is of type integer. 2. In the widget editor, add the widget script below. Information on how to add a widget script here: https://sisense.dev/guides/customJs/extensions/#dashboard-and-widget-javascript-extensions var dateColumns = [4,5,6,7,8]; //select the time columns that should be transformed var thousand_separator = ',' //replace , with your local thousands separator if needed var time_separator = ':' //replace : with your local time separator if needed var returnedData = ""; for (var i = 0; i < dateColumns.length; i++) { returnedData += "td:nth-child(" + dateColumns[i] + ") div"; if (i < dateColumns.length - 1) returnedData += ","; } widget.on('ready', function(se, ev){ var e = element; var w = widget; var d = dashboard; _.each($(returnedData , e).not('.wrapper, .p-head-content'), function(cell){ var num = parseFloat($(cell).text().split(thousand_separator).join('')); var sign = num < 0 ? "-" : ""; num = Math.abs(num); // console.log('num') console.log(num) if(isNaN(num)){ return; } else{ var hours = (parseInt( num / 3600 )); console.log('hours') console.log(hours) var minutes = parseInt( (num - (hours * 3600)) / 60 ); console.log('minutes') console.log(minutes) var seconds = num - (hours * 3600) - (minutes * 60) ; console.log('seconds') console.log(seconds) var hoursText = hours < 10 ? "0" + hours : hours; var minutesText = minutes < 10 ? "0" + minutes : minutes; var secondsText = seconds < 10 ? "0" + seconds : seconds; $(cell).text( sign + hoursText + time_separator + minutesText + time_separator + secondsText); } }) }) 3. Adjust the dateColumns array (line 1) with the index of columns you would like to convert. 4. Save the script. Refresh the widget and click apply. You're all set! Before and after the widget script is applied: Notes: the script may reset the values in the second column to 00:00:00, if this happens simply refresh. This script is based off an older post, updated for the latest version of Sisense.4.2KViews2likes0Comments
Sisense Q2 2021: Build Extensible Insights and Infuse Analytics Beyond the Dashboard
The Sisense Q2 2021 product release gives innovations and enhancements through Infusion Apps and the Extense Framework using Slack, Salesforce, and Google apps, along with Sisense Explanations that allows you to dig deeper into your data and explore additional dimensions of your analytics.4.2KViews0likes0Comments
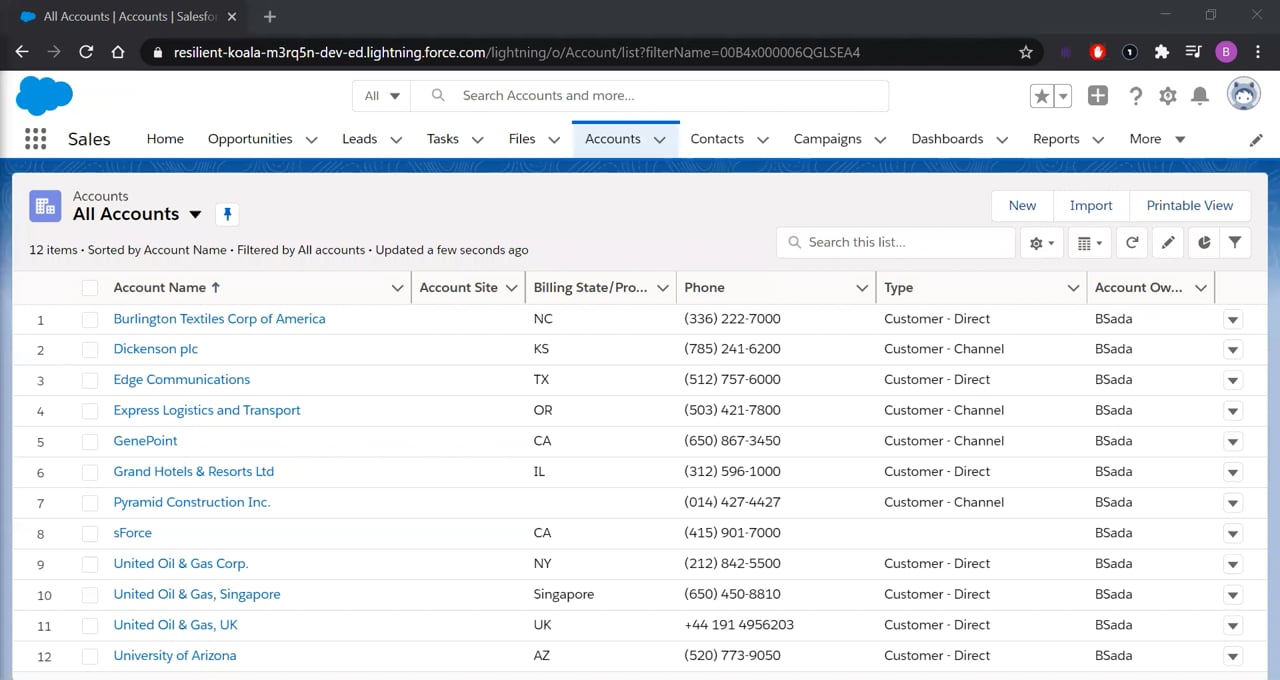
Infusing Analytics into Workflows: Building a Salesforce LWC
Make valuable insights accessible in Salesforce to boost productivity and adoption of analytics, without jumping to a separate dashboard, by following this tutorial that shows how to embed a Sisense dashboard as a lightning webforce component into a Salesforce object.3.6KViews0likes0CommentsBuilding with Blox: A Practical Introduction
Introduction to the Blox plugin in Sisense, starting with the most basic fundamentals. This article is intended to empower users to build confidence in the skills with Blox by introducing the core concepts around code structure, Java, HTML, and CSS.3.4KViews4likes1Comment
Building Confidence (and BloX Widgets) with the Help of Sisense Trainers
My personal experience taking two interactive training sessions with Sisense trainers as a new Sisense user. How I’ve been able to apply new skills to my dashboard work and feel more confident in dashboard design and customizing Blox widgets to get exactly the look and feel I want for my customer experience.2.9KViews7likes2CommentsThe New Age of Analytics is Here: Welcome the Sisense Extense Framework
Announcing Sisense Extense Framework where you can extend analytics in your organizations favorite work applications and allow users to generate actionable intelligence right where they spend their time.2.9KViews0likes0Comments