How to Check SSL Ciphers
How to Check SSL Ciphers If you have enabled SSL on Sisense side, the Nginx controller will be deployed in the default namespace. To check the currently configured ciphers run the following command and check the "nginx.ingress.kubernetes.io/ssl-ciphers:" row: kubectl -n sisense describe ingress Name: sisense-ingress Labels: app=api-gateway app.kubernetes.io/managed-by=Helm chart=api-gateway-2024.2.077 release=sisense sisense-version=2024.2.077 Namespace: sisense Address: Ingress Class: <none> Default backend: <default> TLS: sisense-tls terminates Rules: Host Path Backends ---- ---- -------- paragoninsgroup.sisense.com / api-gateway-external:8456 (10.42.140.227:8456) Annotations: kubernetes.io/ingress.class: nginx kubernetes.io/tls-acme: true meta.helm.sh/release-name: sisense meta.helm.sh/release-namespace: sisense nginx.ingress.kubernetes.io/configuration-snippet: more_clear_headers Server; nginx.ingress.kubernetes.io/proxy-body-size: 0m nginx.ingress.kubernetes.io/proxy-read-timeout: 300 nginx.ingress.kubernetes.io/ssl-ciphers: ECDH+AESGCM:ECDH+CHACHA20:DH+AESGCM:ECDH+AES256:DH+AES256:ECDH+AES128:DH+AES:RSA+AESGCM:RSA+AES:!aNULL:!MD5:!DSS:!AESCCM nginx.ingress.kubernetes.io/ssl-prefer-server-ciphers: true To decrypt the full list of the currently used ciphers use the string from the mentioned row with the following command: openssl ciphers -v 'ECDH+AESGCM:ECDH+CHACHA20:DH+AESGCM:ECDH+AES256:DH+AES256:ECDH+AES128:DH+AES:RSA+AESGCM:RSA+AES:!aNULL:!MD5:!DSS:!AESCCM' | column -t Output Example: ECDHE-RSA-AES256-GCM-SHA384 TLSv1.2 Kx=ECDH Au=RSA Enc=AESGCM(256) Mac=AEAD ECDHE-ECDSA-AES256-GCM-SHA384 TLSv1.2 Kx=ECDH Au=ECDSA Enc=AESGCM(256) Mac=AEAD ECDH-RSA-AES256-GCM-SHA384 TLSv1.2 Kx=ECDH/RSA Au=ECDH Enc=AESGCM(256) Mac=AEAD ECDH-ECDSA-AES256-GCM-SHA384 TLSv1.2 Kx=ECDH/ECDSA Au=ECDH Enc=AESGCM(256) Mac=AEAD ECDHE-RSA-AES128-GCM-SHA256 TLSv1.2 Kx=ECDH Au=RSA Enc=AESGCM(128) Mac=AEAD ECDHE-ECDSA-AES128-GCM-SHA256 TLSv1.2 Kx=ECDH Au=ECDSA Enc=AESGCM(128) Mac=AEAD ECDH-RSA-AES128-GCM-SHA256 TLSv1.2 Kx=ECDH/RSA Au=ECDH Enc=AESGCM(128) Mac=AEAD ECDH-ECDSA-AES128-GCM-SHA256 TLSv1.2 Kx=ECDH/ECDSA Au=ECDH Enc=AESGCM(128) Mac=AEAD DH-DSS-AES256-GCM-SHA384 TLSv1.2 Kx=DH/DSS Au=DH Enc=AESGCM(256) Mac=AEAD DH-RSA-AES256-GCM-SHA384 TLSv1.2 Kx=DH/RSA Au=DH Enc=AESGCM(256) Mac=AEAD DHE-RSA-AES256-GCM-SHA384 TLSv1.2 Kx=DH Au=RSA Enc=AESGCM(256) Mac=AEAD DH-DSS-AES128-GCM-SHA256 TLSv1.2 Kx=DH/DSS Au=DH Enc=AESGCM(128) Mac=AEAD DH-RSA-AES128-GCM-SHA256 TLSv1.2 Kx=DH/RSA Au=DH Enc=AESGCM(128) Mac=AEAD DHE-RSA-AES128-GCM-SHA256 TLSv1.2 Kx=DH Au=RSA Enc=AESGCM(128) Mac=AEAD ECDHE-RSA-AES256-SHA384 TLSv1.2 Kx=ECDH Au=RSA Enc=AES(256) Mac=SHA384 ECDHE-ECDSA-AES256-SHA384 TLSv1.2 Kx=ECDH Au=ECDSA Enc=AES(256) Mac=SHA384 ECDHE-RSA-AES256-SHA SSLv3 Kx=ECDH Au=RSA Enc=AES(256) Mac=SHA1 ECDHE-ECDSA-AES256-SHA SSLv3 Kx=ECDH Au=ECDSA Enc=AES(256) Mac=SHA1 ECDH-RSA-AES256-SHA384 TLSv1.2 Kx=ECDH/RSA Au=ECDH Enc=AES(256) Mac=SHA384 ECDH-ECDSA-AES256-SHA384 TLSv1.2 Kx=ECDH/ECDSA Au=ECDH Enc=AES(256) Mac=SHA384 ECDH-RSA-AES256-SHA SSLv3 Kx=ECDH/RSA Au=ECDH Enc=AES(256) Mac=SHA1 ECDH-ECDSA-AES256-SHA SSLv3 Kx=ECDH/ECDSA Au=ECDH Enc=AES(256) Mac=SHA1 DHE-RSA-AES256-SHA256 TLSv1.2 Kx=DH Au=RSA Enc=AES(256) Mac=SHA256 DH-RSA-AES256-SHA256 TLSv1.2 Kx=DH/RSA Au=DH Enc=AES(256) Mac=SHA256 DH-DSS-AES256-SHA256 TLSv1.2 Kx=DH/DSS Au=DH Enc=AES(256) Mac=SHA256 DHE-RSA-AES256-SHA SSLv3 Kx=DH Au=RSA Enc=AES(256) Mac=SHA1 DH-RSA-AES256-SHA SSLv3 Kx=DH/RSA Au=DH Enc=AES(256) Mac=SHA1 DH-DSS-AES256-SHA SSLv3 Kx=DH/DSS Au=DH Enc=AES(256) Mac=SHA1 ECDHE-RSA-AES128-SHA256 TLSv1.2 Kx=ECDH Au=RSA Enc=AES(128) Mac=SHA256 ECDHE-ECDSA-AES128-SHA256 TLSv1.2 Kx=ECDH Au=ECDSA Enc=AES(128) Mac=SHA256 ECDHE-RSA-AES128-SHA SSLv3 Kx=ECDH Au=RSA Enc=AES(128) Mac=SHA1 ECDHE-ECDSA-AES128-SHA SSLv3 Kx=ECDH Au=ECDSA Enc=AES(128) Mac=SHA1 ECDH-RSA-AES128-SHA256 TLSv1.2 Kx=ECDH/RSA Au=ECDH Enc=AES(128) Mac=SHA256 ECDH-ECDSA-AES128-SHA256 TLSv1.2 Kx=ECDH/ECDSA Au=ECDH Enc=AES(128) Mac=SHA256 ECDH-RSA-AES128-SHA SSLv3 Kx=ECDH/RSA Au=ECDH Enc=AES(128) Mac=SHA1 ECDH-ECDSA-AES128-SHA SSLv3 Kx=ECDH/ECDSA Au=ECDH Enc=AES(128) Mac=SHA1 DHE-RSA-AES128-SHA256 TLSv1.2 Kx=DH Au=RSA Enc=AES(128) Mac=SHA256 DH-RSA-AES128-SHA256 TLSv1.2 Kx=DH/RSA Au=DH Enc=AES(128) Mac=SHA256 DH-DSS-AES128-SHA256 TLSv1.2 Kx=DH/DSS Au=DH Enc=AES(128) Mac=SHA256 DHE-RSA-AES128-SHA SSLv3 Kx=DH Au=RSA Enc=AES(128) Mac=SHA1 DH-RSA-AES128-SHA SSLv3 Kx=DH/RSA Au=DH Enc=AES(128) Mac=SHA1 DH-DSS-AES128-SHA SSLv3 Kx=DH/DSS Au=DH Enc=AES(128) Mac=SHA1 AES256-GCM-SHA384 TLSv1.2 Kx=RSA Au=RSA Enc=AESGCM(256) Mac=AEAD AES128-GCM-SHA256 TLSv1.2 Kx=RSA Au=RSA Enc=AESGCM(128) Mac=AEAD AES256-SHA256 TLSv1.2 Kx=RSA Au=RSA Enc=AES(256) Mac=SHA256 AES256-SHA SSLv3 Kx=RSA Au=RSA Enc=AES(256) Mac=SHA1 AES128-SHA256 TLSv1.2 Kx=RSA Au=RSA Enc=AES(128) Mac=SHA256 AES128-SHA SSLv3 Kx=RSA Au=RSA Enc=AES(128) Mac=SHA1 Check out this related content: Academy course Sisense Documentation753Views0likes0Comments
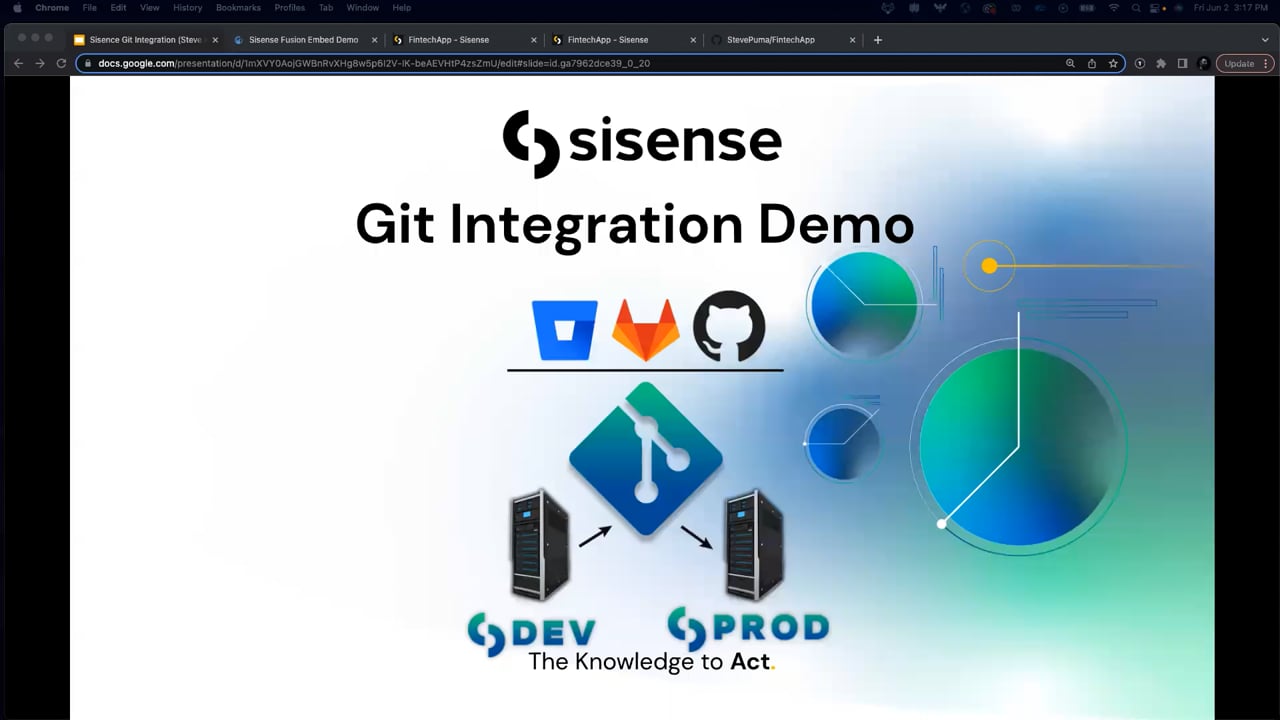
Migrating Assets Across Environments Leveraging GIT
Migrating Assets Across Environments Leveraging GIT Sisense released its Git Integration for Linux version 2022.10. With the GIT GUI in Sisense, you can can do a lot of exciting things like version control or integrate into CI/CD pipelines. I went ahead and put together a quick demo on how a developer can leverage the Sisense Git Integration to migrate assets from their Dev Environment to the Prod Environment and see those changes reflected in the target application that assets are embedded in. In this video we cover: 1. How to create a Git project in Sisense 2. Add Assets to a project 3. Connect to a remote Git Repo. 4. Push Assets from Dev to a remote Github Repo. 5. Pull Assets from Git Repo into the prod server. 6. Checkout and Commit changes/revert. 7. See Changes reflected in the application Sisense is embedded into. For any additional questions about Enabling Git in your environment, or other capabilities, please see the Introduction to Sisense Git Documentation.1.7KViews1like0CommentsConfiguring/Adjusting Readiness Probes for Containers
Readiness probes are critical in container orchestration to ensure that containers are ready to handle traffic before they are included in service load balancing. If a container fails readiness probes due to insufficient thresholds, adjusting these parameters can help. This guide explains how to modify readiness probe settings to accommodate containers with longer startup times.512Views1like0Comments
Resend Invitations to Inactive Users in Bulk
Steps: 1) Download Python and install it on your PC or the Sisense machine (make sure to add python to the PATH to easily initiate installation of directories). 2) Run CMD and type the following commands to add libraries used as part of our solution: - pip install requests - pip install json 3) Create a .py file and add the following script to it: import requests import json username = '[email protected]' #replace with an admin user's user name password = 'password' #replace with an admin user's password Sisense_url = 'http://localhost:8081' #replace with your Sisense url # Get Auth token url = Sisense_url+"/api/v1/authentication/login" payload = "username="+username.replace('@','%40')+"&password="+password headers = { 'content-type': "application/x-www-form-urlencoded" } response = requests.request("POST", url, data=payload, headers=headers) auth_token = response.json()["access_token"] auth_token = "Bearer " + auth_token headers = { 'Content-Type': 'application/json', 'Accept': 'application/json', 'Authorization': auth_token } url = Sisense_url + '/api/v1/users' resendUrl = Sisense_url + '/api/v1/account/begin_activate' response = requests.request("GET", url, headers=headers) users = response.json() #Sending invites for inactive users total = 0 for item in users: active = item["active"] if not active: email = item["email"] payload = '{"email": ' +'"'+email+'"}' response = requests.request("POST", resendUrl, data=payload, headers=headers) print(item["email"]) total = total+1 print(total) 4) This process can be automated using a Windows Task Scheduler as well. That's it!588Views1like0CommentsPython 3 Script to Import Many ElastiCubes
Introduction The attached script is intended to loop through all ElastiCube folders in your ElastiCubeData folder and import them. Business Case This solution has a couple of possible use cases. The first is to facilitate migrating a Sisense environment with a large number of ElastiCubes. The second would be in the case of disaster recovery, where a number of ElastiCubes must be reattached. Requirements Python 3 must be installed. There should be at least one ElastiCube folder in your ElastiCubeData folder that is intended to be imported. Step 1 Download the attached Python3 Script to your ElastiCubeData folder(usually C:\ProgramData\Sisense\PrismServer\ElastiCubeData). Step 2 Open a IDLE (Python Editor) window as an Administrator. Note: You will get a prompt to allow changes for each ElastiCube unless you run as an Administrator. Step 3 Load the script into IDLE and run. This can take some time to import all ElastiCubes depending on how many you have and the size. Enjoy! Script: import os import subprocess def ImportEC(ECube): cmdline = ["cmd", "/q", "/k", "echo off"] cmd = subprocess.Popen(cmdline, stdin=subprocess.PIPE, stdout=subprocess.PIPE) batch = b"""\ cd C:\Program Files\Sisense\Prism psm ecube attach path="C:\ProgramData\Sisense\PrismServer\ElastiCubeData\ElasticubeToImport" set /p exit """ ECubeBytes = bytes(ECube, 'utf-8') batch = batch.replace(rb'ElasticubeToImport', ECubeBytes) print(batch) cmd.stdin.write(batch) cmd.stdin.flush() result = cmd.stdout.read() EC_List = next(os.walk('.'))[1] for EC in EC_List: print('Python appending EC: ' + EC) ImportEC(EC)714Views0likes0CommentsElevate Your Data Product’s Quality with Streamlined Version Control leveraging Our Git Integration
Elevate Your Data Product’s Quality with Streamlined Version Control Leveraging the Sisense Git Integration! In today's CI/CD ecosystems, efficient asset migration from development to production environments is crucial for delivering high-quality data products. Sisense being a leading embedded analytics technology offers a powerful Git integration that simplifies and enhances the migration process. In this blog, we will explore leveraging the Sisense Git Version Control to streamline asset migration, ensuring smooth transitions and maintaining data product integrity. To understand the value of Sisense Git Version Control it is important to understand what Git is. Git offers users (often developers and/or engineers) a structured and efficient approach to managing files, collaborating with others, and maintaining a clear history of changes. Git enhances team productivity, reduces errors, and provides a sense of control over projects. Teams who leverage Git ultimately benefit from better organization, teamwork, and effective management of files and projects. When building your data products in a technology like Sisense, there is massive value in integrating with your developer’s CI/CD workflow for continuity, quality, and time to delivery. Users who leverage the Sisense Git Version Control can collaborate on building data products, manage changes to products over time, and migrate assets across Sisense environments through remote Git repositories. The Sisense Git Integration is a feature that is offered out of the box with Sisense Linux Version(s) 2022.10 and up. To begin leveraging the Sisense Git Integration feature you can click on the Git Logo in the top right of your Sisense environment. The Git GUI will open in a separate browser tab and you will be asked to create a new project. After creating a new project your team will be prompted to name the project, name the default branch, and if you desire to connect to a remote Git repository (further instructions are included in Sisense Git Documentation depending on which Git repository your team leverages). After these steps are complete you can choose to invite others to collaborate with you on the project. If you choose collaborators or decide to lone-wolf a project you will be asked next if you’d like to “add assets” to the project. Do not worry lonely wolves, if you would like to invite collaborators down the road you can share the project after the fact. Assets available to modify/track in Sisense Git Version Control are Data Models and Dashboards, or you can simply continue without if you intend to “Pull” Sisense assets from a remote repository. Once a team has created and defined a project, they can start working. Users familiar with Git will find continuity in terminology and functionality with the Sisense Git GUI and popular Git repositories. Dashboards and Models are compressed into JSON files, allowing users to review, commit, or discard changes. Teams can create branches, checkout branches, and revert changes if needed. When a project is ready to progress to the next stage, users can "Push" the assets/branches to the remote repository. The assets can be reviewed in their JSON format in the remote repository. If a CI/CD pipeline includes QA, Staging, or Production Sisense environments, users can leverage the Git GUI in those environments to "Pull" assets for review or publication. So let’s land this plane! The Sisense Git Integration is a tool that provides tremendous value to your developer/engineering team's workflow, while significantly improving your business with better data product quality and delivery. If your team already leverages Git, this tool will be easy to incorporate and drive value. For users unfamiliar with Git, we strongly recommend adopting this approach, as it only involves a minimal learning curve but offers improved version control, streamlined asset migration, and overall enhanced quality. We hope this information3.9KViews3likes0Comments