Setting Up SSO SAML 2.0 With ADFS
Topics covered:
- ADFS SAML - introduction
- Prerequisite configuration for ADFS 2.0 and ADFS 3.0
- Adding Sisense as Service provider to ADFS
- Claim configuration for Sisense in ADFS
- Sending ADFS groups for the Sisense user. “MemberOf” property.
- Exporting ADFS certificate
- Configuring Sisense SSO SAML on Admin panel
- Troubleshooting ADFS
- Error on ADFS side
- #1 Issue: Sisense application redirects to the ADFS page with errors and not redirects to Sisense
- #2 Issue: User prompted for a username and password two times when access from an intranet.
- Error on Sisense side
- #3 Issue: After successful login into ADFS Sisense redirects to the login page
- #4 Issue: For a new user: after a successful login into ADFS Sisense redirects to the login page, but the user was created in the Sisense app. Next login through ADFS successful
- Error on ADFS side
ADFS SAML - introduction
ADFS is a standards-based service that allows the secure sharing of identity information between trusted business partners (known as a federation) across an extranet. When a user needs to access a Web application from one of its federation partners, the user's own organization is responsible for authenticating the user and providing identity information in the form of "claims" to the partner that hosts the Web application. The hosting partner uses its trust policy to map the incoming claims to claims that are understood by its Web application, which uses the claims to make authorization decisions.
To find out more about ADFS please check: https://msdn.microsoft.com/en-us/library/bb897402.aspx
1. Prerequisite configuration for ADFS 2.0 and ADFS 3.0
For ADFS 2.0, you must install update KB2681584 (Update Rollup 2) or KB2790338 (Update Rollup 3) to provide RelayState support. ADFS 3.0 has RelayState support built in. In both cases RelayState still needs to be enabled.
Use the following steps to enable the RelayState parameter on your ADFS servers:
- For ADFS 2.0, open the following file in Notepad:
%systemroot%\inetpub\adfs\ls\web.config %systemroot%\inetpub\adfs\ls\web.config
- For ADFS 3.0, open the following file in Notepad:
%systemroot%\ADFS\Microsoft.IdentityServer.Servicehost.exe.config %systemroot%\ADFS\Microsoft.IdentityServer.Servicehost.exe.config
- In the microsoft.identityServer.web section, add a line for useRelayStateForIdpInitiatedSignOn as follows, and save the change:
<microsoft.identityServer.web>
...
 <useRelayStateForIdpInitiatedSignOn enabled="true" />
...
</microsoft.identityServer.web>
<microsoft.identityServer.web>
...
<useRelayStateForIdpInitiatedSignOn enabled="true" />
...
</microsoft.identityServer.web>
- For ADFS 2.0, run IISReset to restart IIS.
- For both platforms, restart the Active Directory Federation Services (adfssrv) service.
If you're using ADFS 3.0 you only need to do the above on your ADFS 3.0 servers, not the WAP servers.
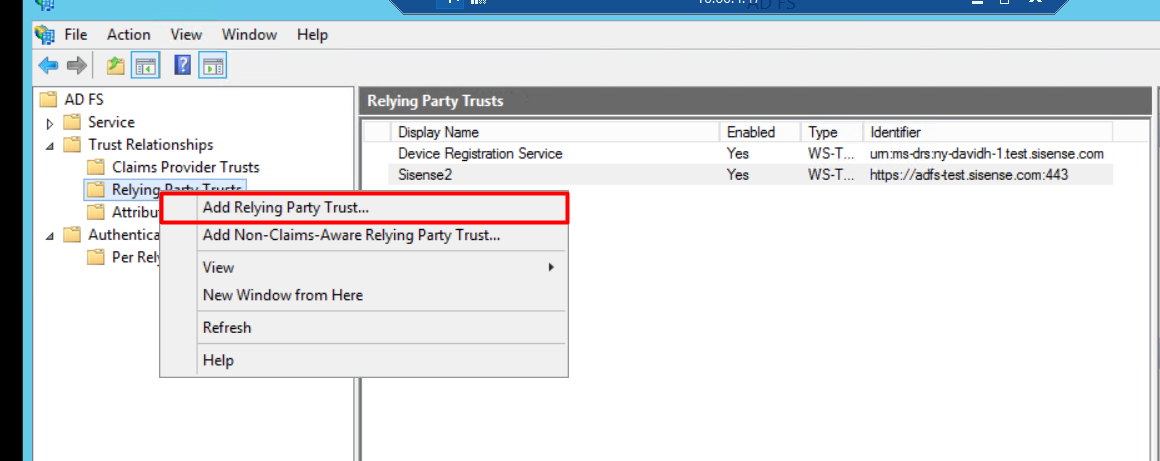
2. Adding Sisense as Service provider to ADFS
1. Open the AD FS 3.0 Management Console and select [Add Relying Party Trust] to start the Add Relying Party Trust Wizard.
Click Start.
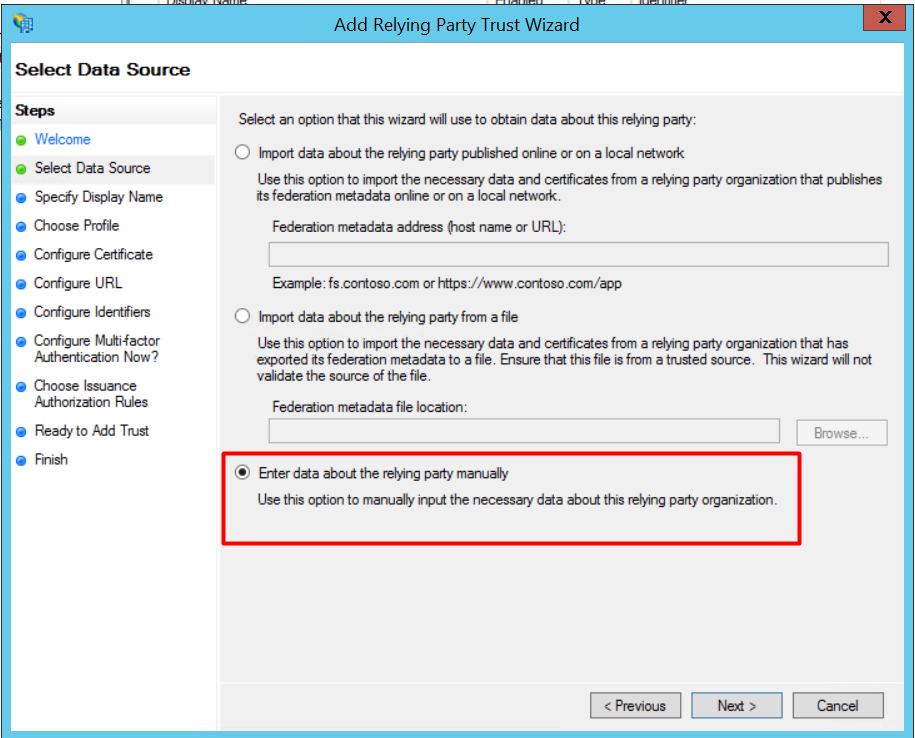
2. Select “Enter date about the relying party manually” and click [Next].
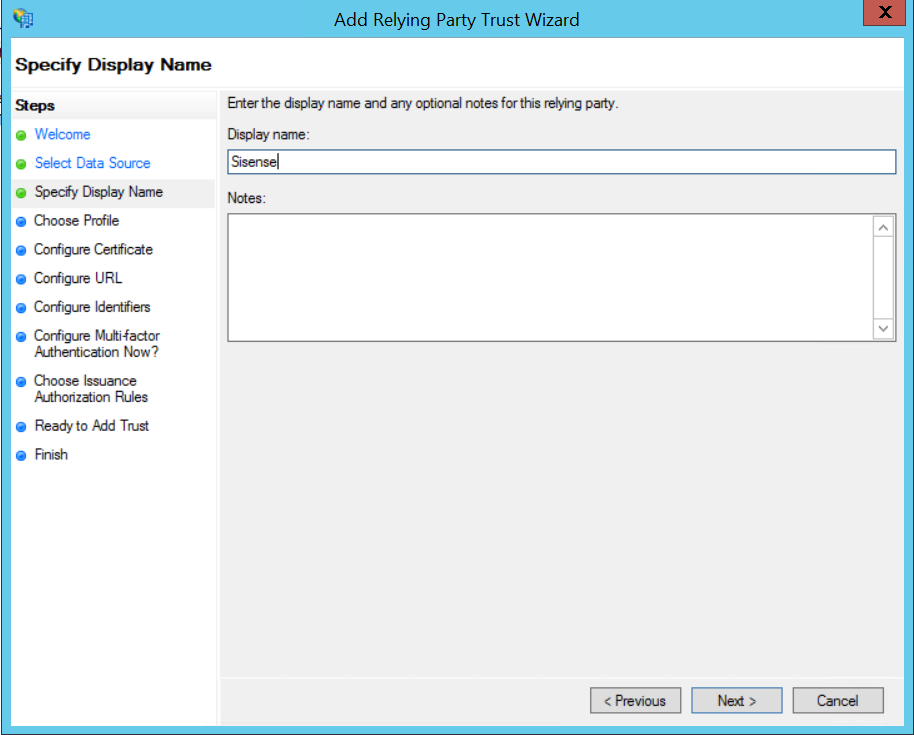
 3. Specify a display name of your choice and click [Next].
 4. Select "AD FS profile" and click [Next].
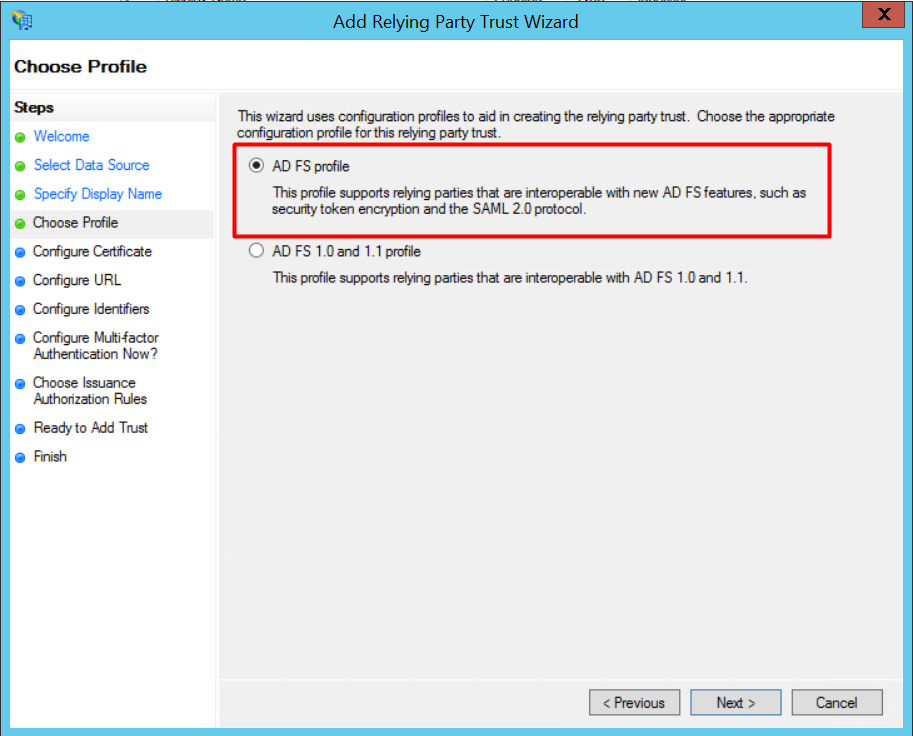 5. Just click [Next] on the Configure Certificate Page
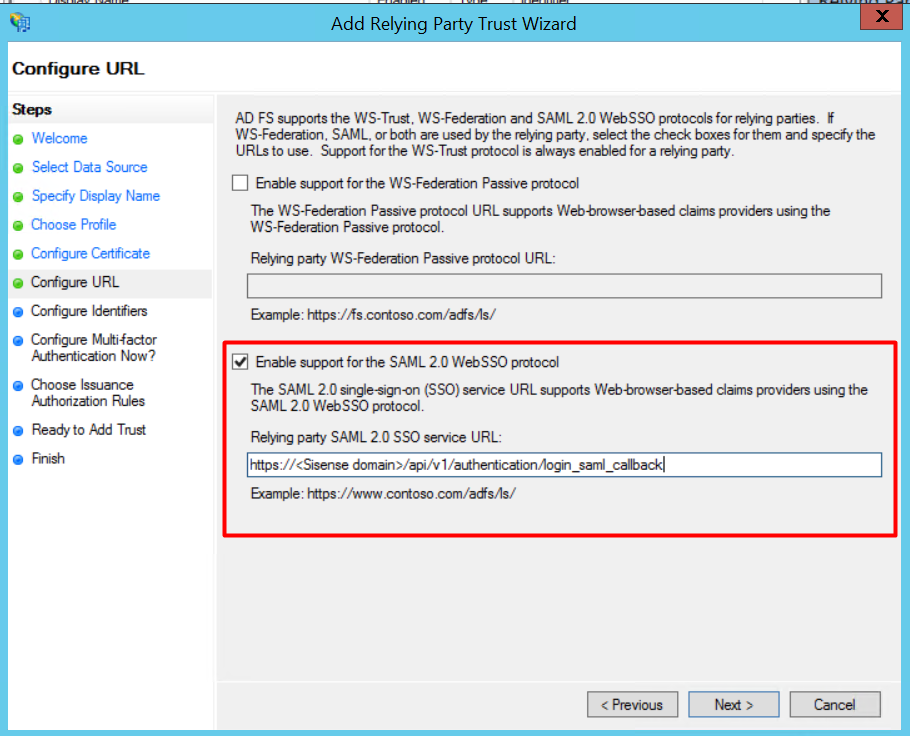
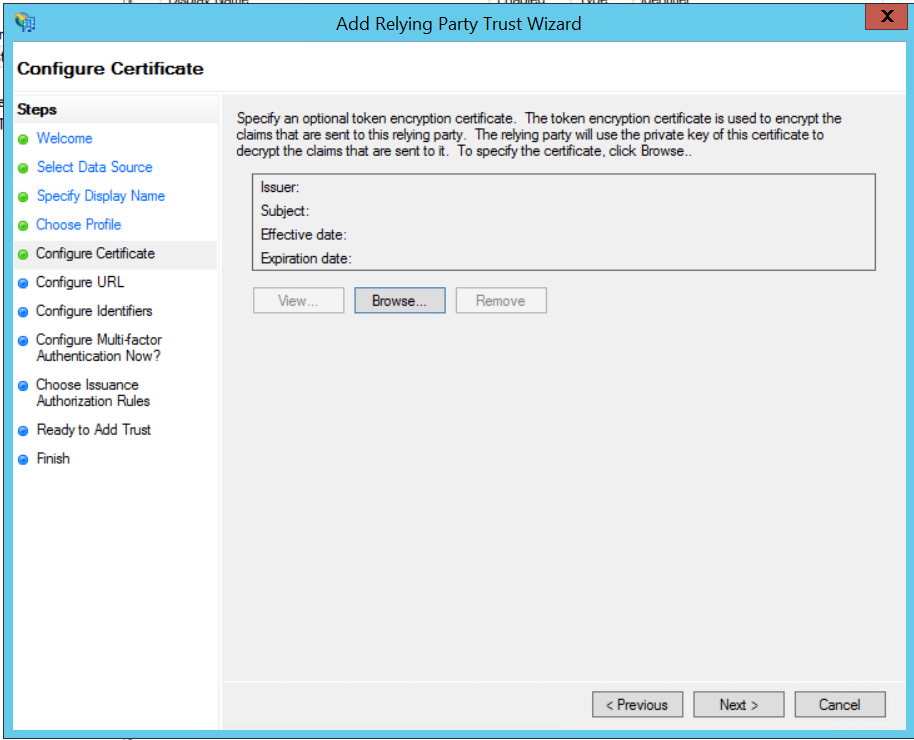 6. Select “Enable support for the SAML WebSSO protocol” and configure the URL to the SAML plugin URL as a Relying party SAML SSO service URL.
This URL has the following format
https://<Sisense domain>/api/v1/authentication/login_saml_callback/
Click [Next].
Click [Next].
 7. Enter Sisense as a "Relying party trust identifier" and click [Add] to add it to the list. Click [Next].
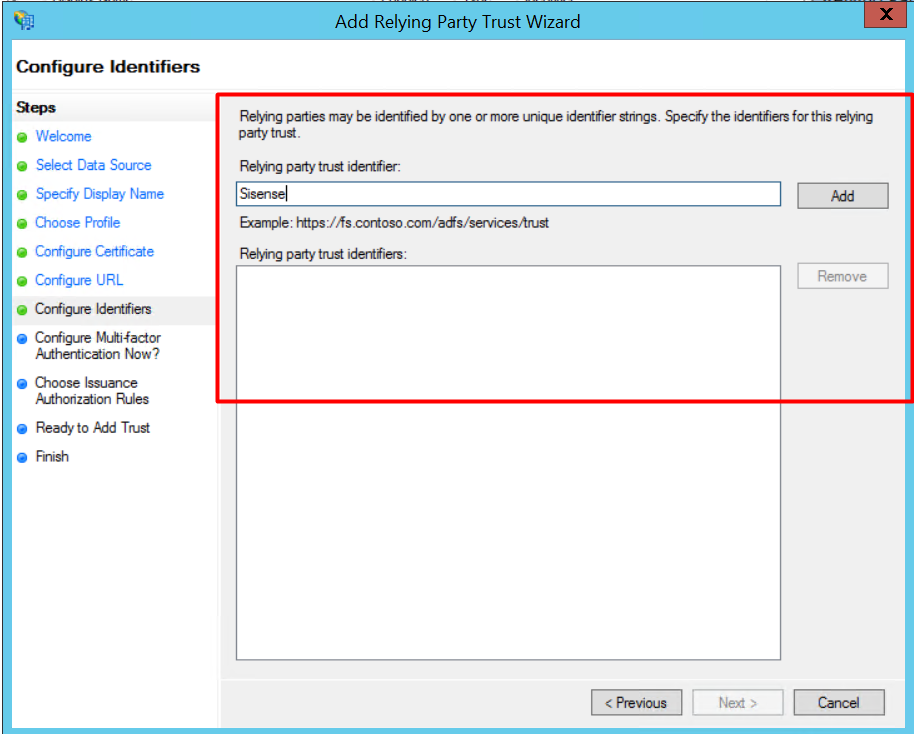
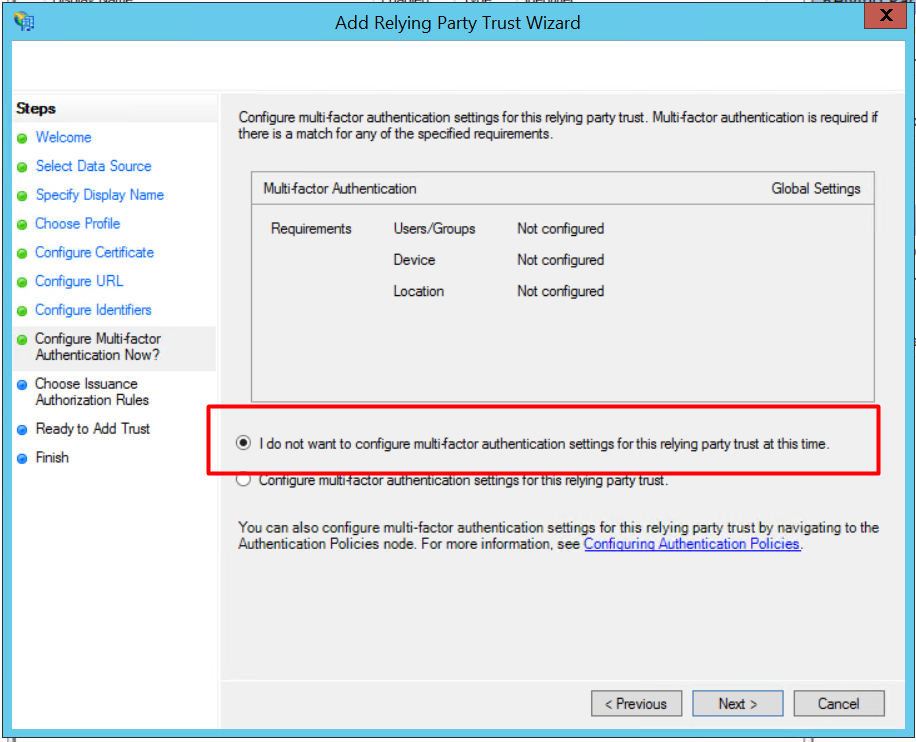
8. Select “I do not want to configure multi-factor..”. Click [Next].
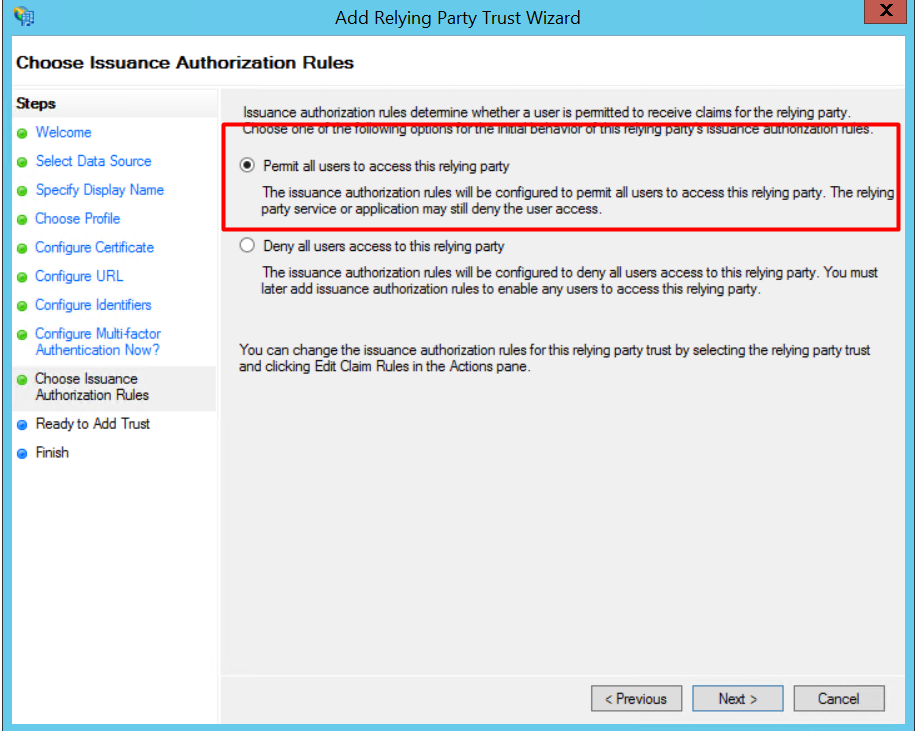
9. Select "Permit all users to access the relying party" and click [Next].
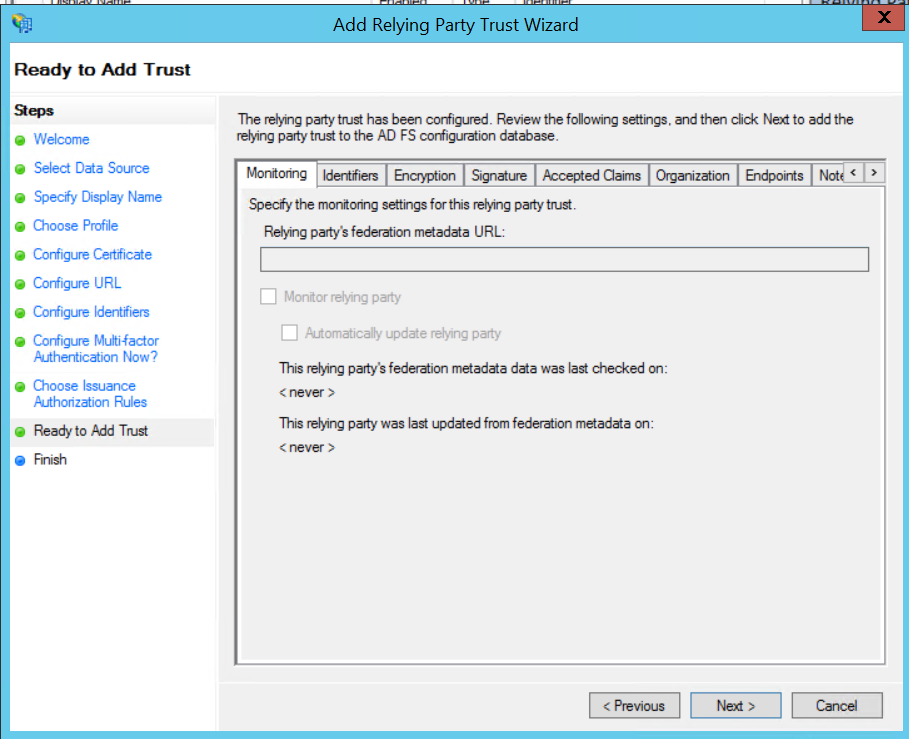
 10. Just click [Next] on the next page, tick "Open the Edit Claim Rules dialog" and click [Close].
9. Select "Permit all users to access the relying party" and click [Next].
10. Just click [Next] on the next page, tick "Open the Edit Claim Rules dialog" and click [Close].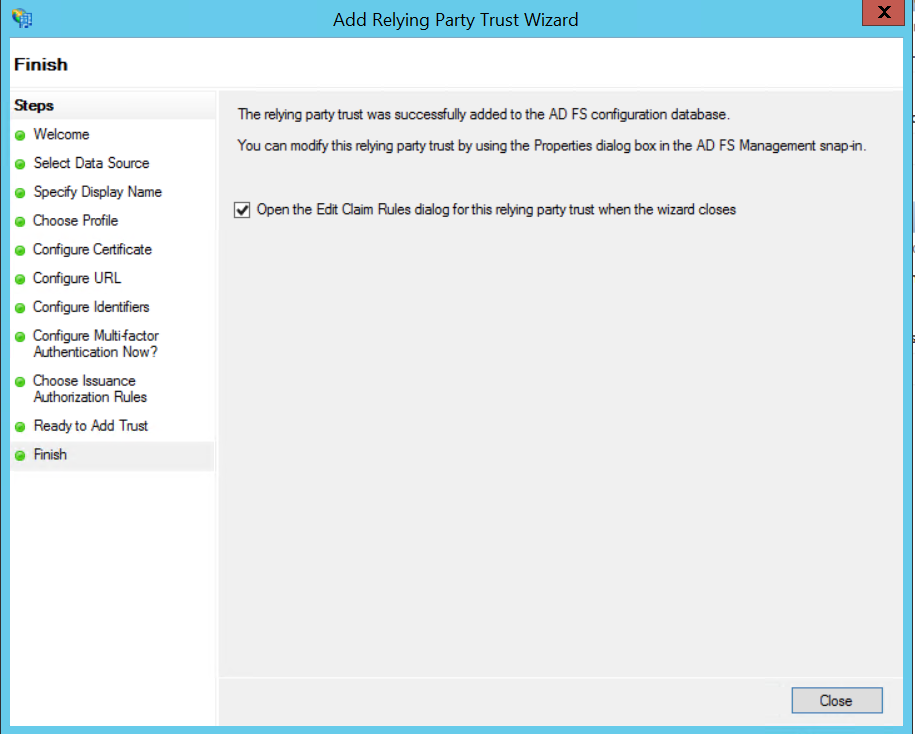 11. The Edit Claim Rules window opens. In the first tab, click [Add Rule].
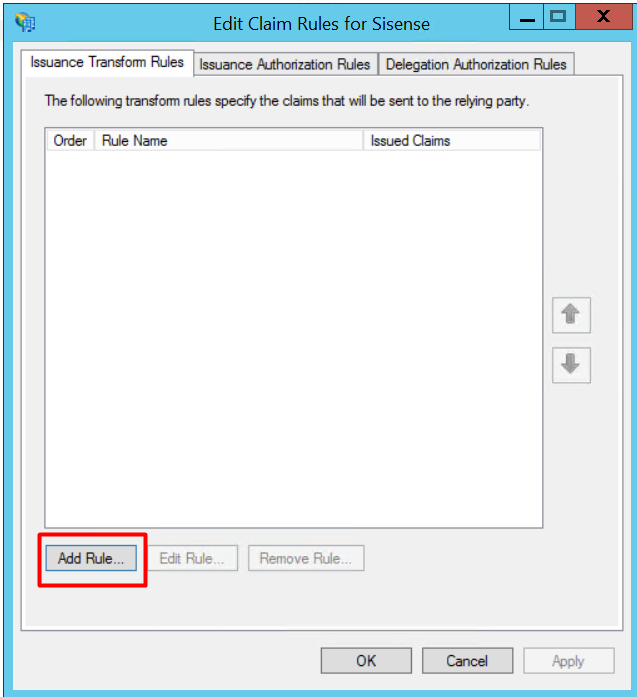
3. Claim configuration for Sisense in ADFS
3.1. NameID claim and transformation rule for the latest Sisense versions
12. Select "Send LDAP Attributes as Claims" and click [Next].  13. Enter "User.email" as the name of the rule. Select "Active Directory" as the Attribute store. Select the "LDAP Attribute" containing "E-Mail-Addresses" and "E-Mail-Addresses" as "Outgoing Claim Type". Click [Finish].
13. Enter "User.email" as the name of the rule. Select "Active Directory" as the Attribute store. Select the "LDAP Attribute" containing "E-Mail-Addresses" and "E-Mail-Addresses" as "Outgoing Claim Type". Click [Finish].
14. Click [Add rule].
15. Select "Transform an Incoming Rule" as a "Claim rule template". Click [Next].

16. Configure rule as per the table below:
Parameter | Value |
|---|---|
Claim rule name | EmailToNameID |
Incoming claim type | E-Mail Address |
Incoming name ID format | Unspecified |
Outgoing claim type | Name ID |
Outgoing name ID format | Email |
Mode | Pass through all claim values |

17. Click [Finish].
3.2. Claim configuration for previous Sisense versions
For the Sisense Windows versions > 6.7 and < 8.2.1, or Sisense Linux version < L8.0.4, add two claim rules and two transformation rules
12. Select "Send LDAP Attributes as Claims" and click [Next]. 13. Enter a name of your choice for the rule. Select "Active Directory" as the Attribute store. Select the "LDAP Attribute" containing "E-Mail-Addresses" and "User.email" as "Outgoing Claim Type". Click [Finish]. Add a similar configuration in another rule specifying "nameID" as "Outgoing Claim Type".
13. Enter a name of your choice for the rule. Select "Active Directory" as the Attribute store. Select the "LDAP Attribute" containing "E-Mail-Addresses" and "User.email" as "Outgoing Claim Type". Click [Finish]. Add a similar configuration in another rule specifying "nameID" as "Outgoing Claim Type".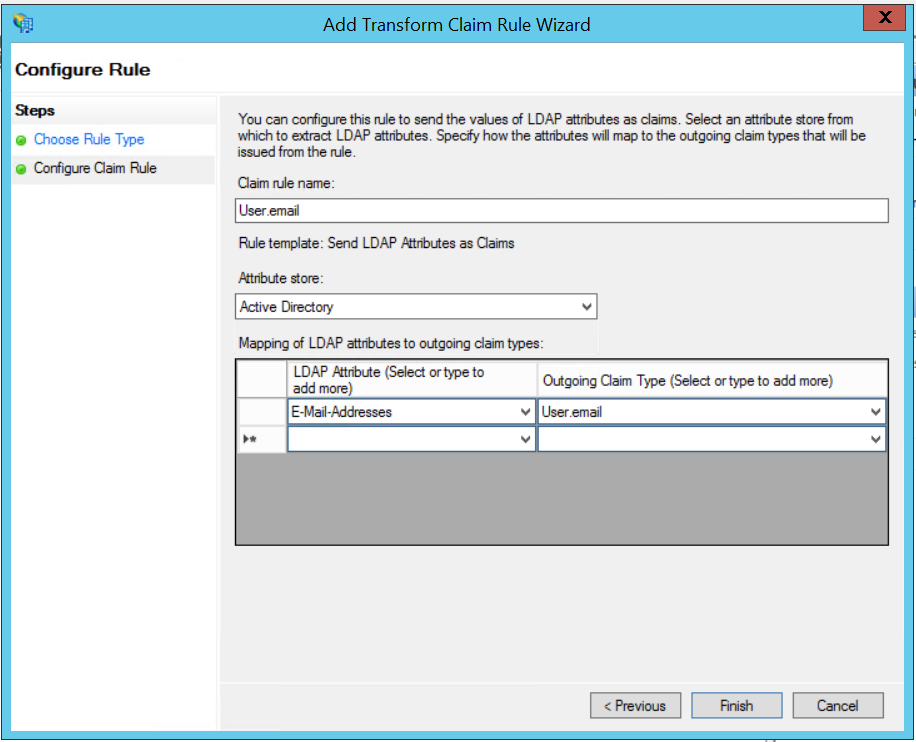 Result:
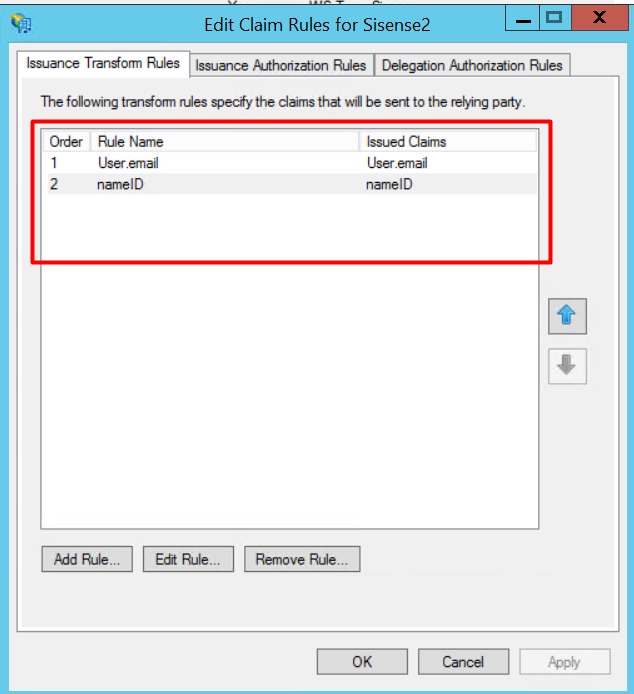
14. Add two more custom rules rule by clicking [Add Rule].
15. Select "Send Claims Using Custom Rule". Click [Next]. 
16. Specify "Step1" and "Step2" as claim rule names and enter the respective custom rule code. 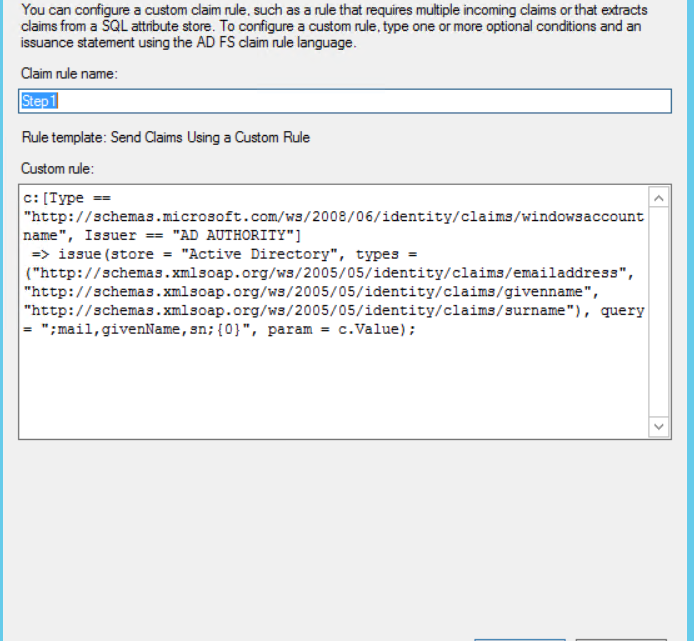 Create 2 rules called Step1 & Step2:
Create 2 rules called Step1 & Step2: Custom Rule for Step1:
c:[Type == "http://schemas.microsoft.com/ws/2008/06/identity/claims/windowsaccountname", Issuer == "AD AUTHORITY"]
=> issue(Type = "http://schemas.xmlsoap.org/ws/2005/05/identity/claims/nameidentifier", Issuer = c.Issuer, OriginalIssuer = c.OriginalIssuer, Value = c.Value, ValueType = c.ValueType, Properties["http://schemas.xmlsoap.org/ws/2005/05/identity/claimproperties/format"] = "urn:oasis:names:tc:SAML:2.0:nameid-format:emailAddress");
Custom Rule for Step2:
=> issue(Type = "http://schemas.xmlsoap.org/ws/2005/05/identity/claims/nameidentifier", Issuer = c.Issuer, OriginalIssuer = c.OriginalIssuer, Value = c.Value, ValueType = c.ValueType, Properties["http://schemas.xmlsoap.org/ws/2005/05/identity/claimproperties/format"] = "urn:oasis:names:tc:SAML:2.0:nameid-format:emailAddress");
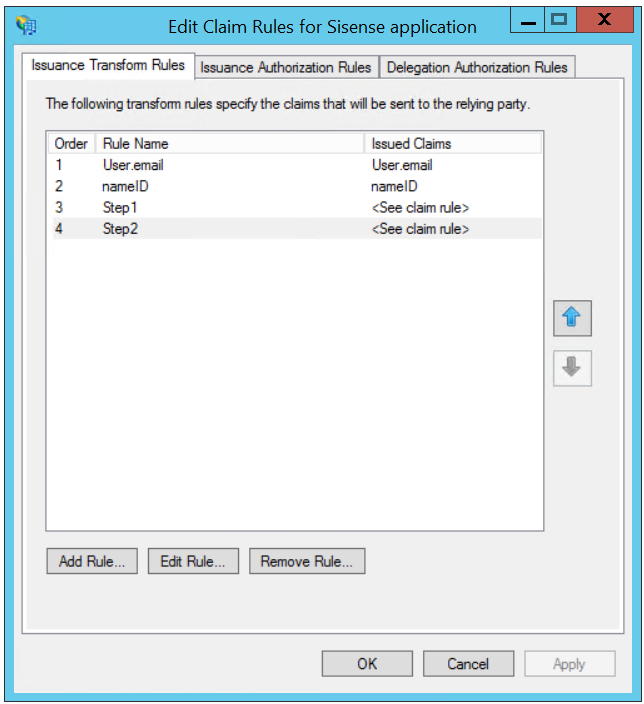
Keep Rules for Step1 and Step2 in the correct order.
Result:
Using proxy handler for ADFS 3 (Sisense Windows < 6.7 version)
12. Select "Send LDAP Attributes as Claims" and click [Next]. 13. Enter a name of your choice for the rule. Select "Active Directory" as the Attribute store. Select the "LDAP Attribute" containing "E-Mail-Addresses" and "User.email" as "Outgoing Claim Type". Click [Finish]. Add a similar configuration in another rule specifying "nameID" as "Outgoing Claim Type".
13. Enter a name of your choice for the rule. Select "Active Directory" as the Attribute store. Select the "LDAP Attribute" containing "E-Mail-Addresses" and "User.email" as "Outgoing Claim Type". Click [Finish]. Add a similar configuration in another rule specifying "nameID" as "Outgoing Claim Type".Result:14. ADFS requires a different structure of the SAML Request than the one used by Sisense Windows < 6.7 versions. For this purpose, you can use a proxy handler. The handler will rebuild the SAML XML request per the ADFS requirements.
! Starting from Sisense > 6.7 ADFS can be configured without an additional handler, please check more details in For the Sisense Windows versions > 6.7 and < 8.2.1, or Sisense Linux version < L8.0.4, add two claim rules and two transformation rules.
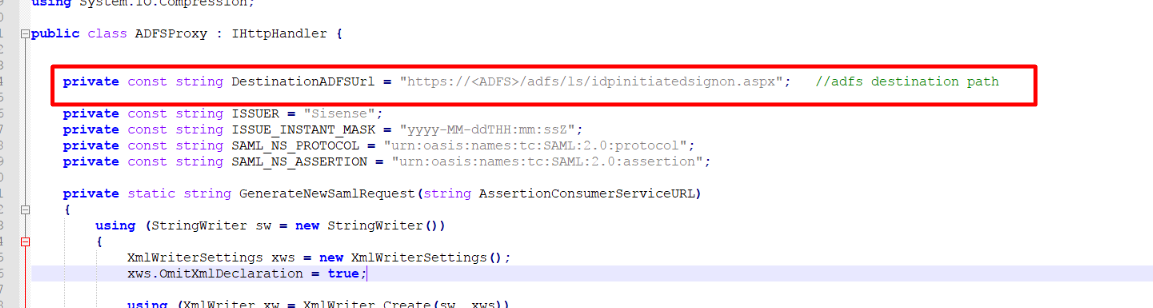
You can modify the handler that builds a new SAML Request per your needs in order to keep the correct communication with your ADFS provider.
Put the Handler to the different IIS Web Site (not Sisense), replace DestinationADFSUrl with your ADFS server address.
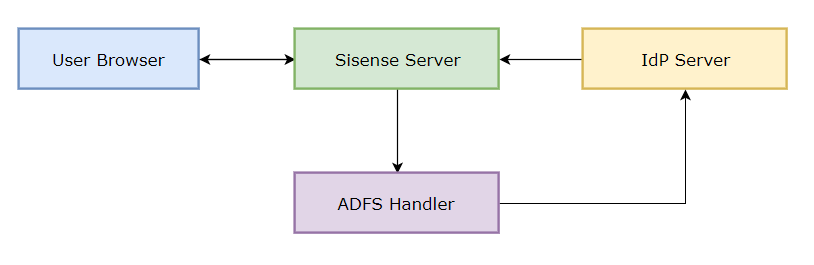
Original SAML Workflow
More details: https://documentation.sisense.com/sso-via-saml-2-0/

SAML Workflow with ADFS Handler
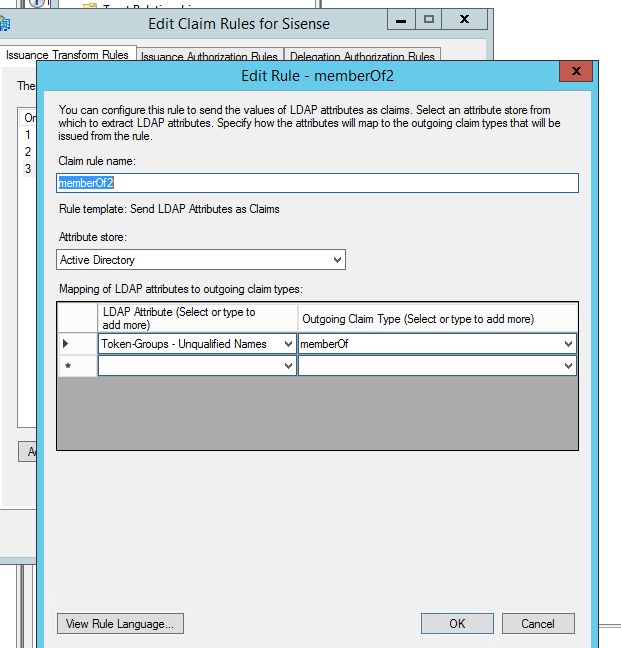
4. Sending ADFS groups for the Sisense user. “MemberOf” property.
In addition, ADFS can be configured to send user groups in the memberOf property.
When the user logs in through ADFS, if the user does not exist in Sisense, Sisense creates a new user.
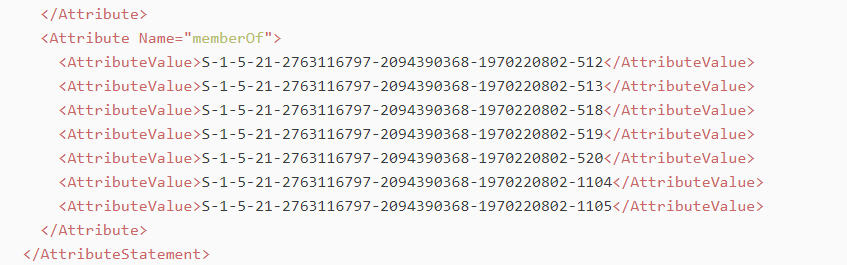
When Sisense creates a new user, Sisense analyzes the “memberOf” field to locate one or more groups related to the logged-in user. User will be created with the groups sent from the ADFS in case if these groups were previously created in Sisense.
In ADFS, create Claim Rule (names or SIDS) :
ADFS will send to Sisense the list of the user’s groups in the XML Response:
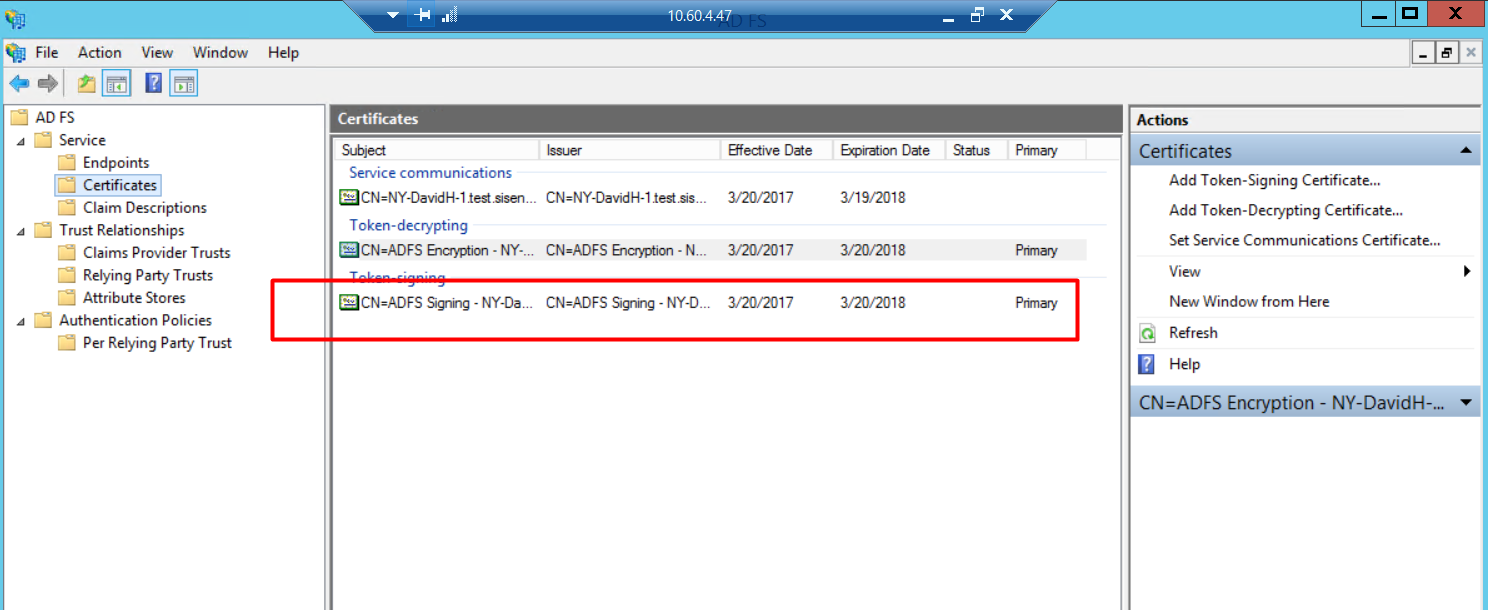
5. Exporting ADFS certificate
- The SAML response coming from ADFS is signed to ensure that the authentication is coming from the correct Identity Provider
In the ADFS management console, click the Certificates folder and double-click on the Token Signing certificate.
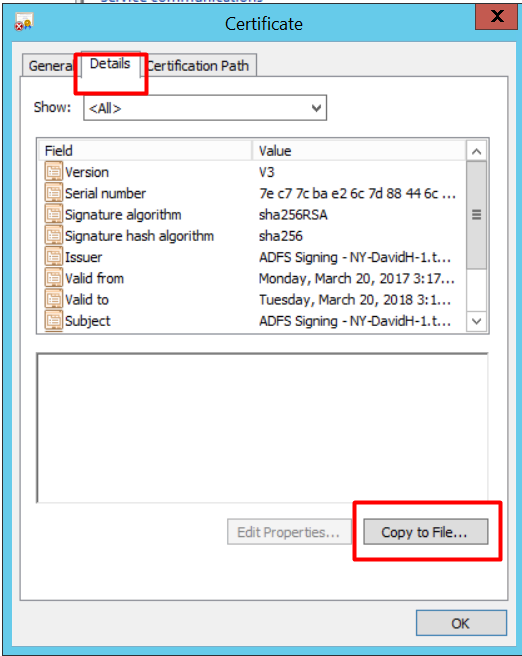
2. Click the Details tab and the Button [Copy To File].
Export the certificate as Base-64 encoded X.509 (.CER)
Export the certificate as Base-64 encoded X.509 (.CER)
Open the exported file in a text editor and copy the content to use it in your Sisense application
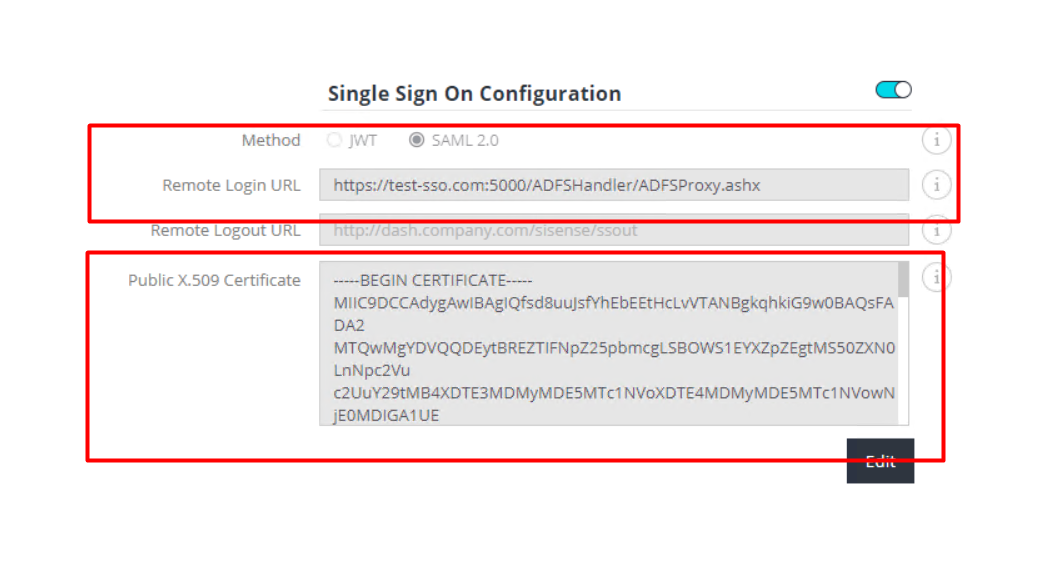
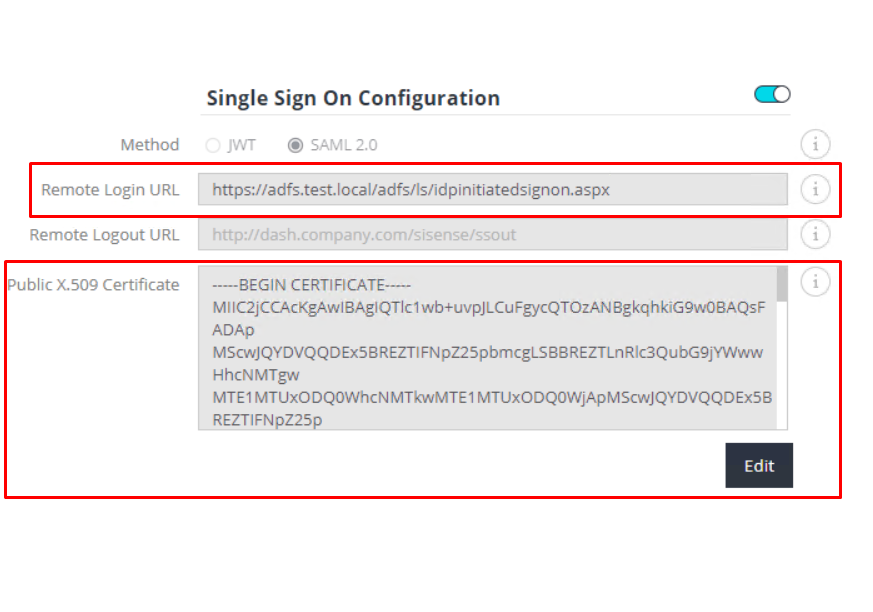
6. Configuring Sisense SSO SAML on Admin panel
- Use the previously saved certificate.
- In the “Single Sign-On” tab on the “Sisense Admin” panel:
- Select SAML mode, enable SSO toggle
- Edit configuration and paste Public X.509 Certificate
- For the Remote Login URL specify "https://<adfs domain>/adfs/ls/idpinitiatedsignon.aspx". If you use a custom handler, then specify the URL address of the handler.
3. Save configuration
Troubleshooting ADFS
In case if you can’t find some of the issues here, please check Sisense logs and ADFS logs and check additional information on microsoft.com help pages.
Error on ADFS side:
#1 Issue: Sisense application redirects to the ADFS page with errors and not redirects to Sisense
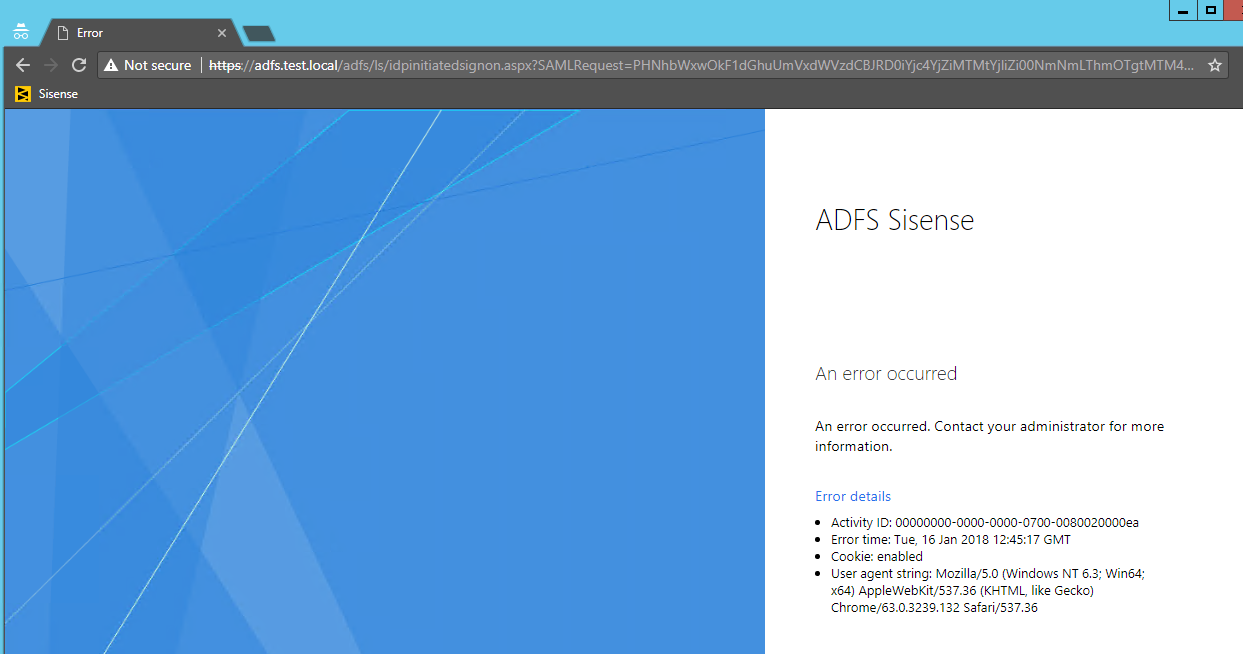
Investigation: Check ADFS errors in the Windows event viewer.
Error 1:
Error 1:

Error 2:

Error 3:

Case: ADFS can’t parse XML Request / Issues with configurations / Wrong Assertion Consumer URL
Solution:
Error 1: Verify that you applied correct version of ADFS handler
Error 2: Set correct Incoming rules for Sisense > version 6.7
Error 3: Verify that Assertion Consumer URL in ADFS config matches URL in Error. ADFS supports only https URL, make sure you are accessing Sisense from https.
#2 Issue: User prompted for a username and password two times when access from an intranet.
Hotfix from Microsoft: https://support.microsoft.com/en-us/help/3018886/you-are-prompted-for-a-username-and-password-two-times- when-you-access
Case: If multi-factor authentication deployed on ADFS.
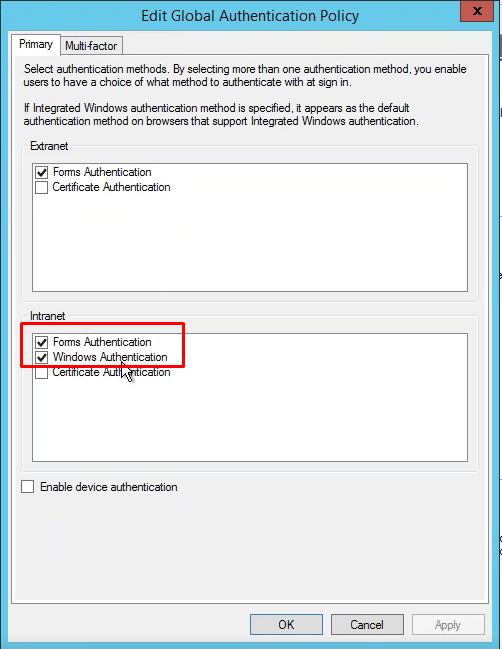
Solution:
If hotfix didn’t help, please remove lines in ADFSHandler for your Sisense version that sets authentication suggestions:
xw.WriteStartElement("samlp", "RequestedAuthnContext", SAML_NS_PROTOCOL);
xw.WriteAttributeString("Comparison", "minimum");
xw.WriteStartElement("saml", "AuthnContextClassRef", SAML_NS_ASSERTION);
xw.WriteString("urn:federation:authentication:windows");
xw.WriteEndElement();
xw.WriteStartElement("saml", "AuthnContextClassRef", SAML_NS_ASSERTION); xw.WriteString("urn:oasis:names:tc:SAML:2.0:ac:classes:PasswordProtectedTransport");
xw.WriteEndElement();
xw.WriteEndElement(); // RequestedAuthnContext
Errors on Sisense side
#3 Issue: After successful login into ADFS Sisense redirects to the login page
Investigation: Check Sisense logs, search the logs which contain the word SAML.
C:\ProgramData\Sisense\PrismWeb\Logs\nodejsLogs.log
C:/Program%20Files/Sisense/PrismWeb/vnext/iisnode/index.html
C:/Program%20Files/Sisense/PrismWeb/vnext/iisnode/index.html
Case: Error message in logs:
Error 1: [ERROR] [baseMongo]: [SAML authentication with incorrect credentials]
Error 2: SAML authentication with incorrect credentials Error: SAML assertion expired
Error 2: SAML authentication with incorrect credentials Error: SAML assertion expired
Solution:
Error 1: Verify that Public X.509 Certificate in SSO page in Sisense app matches certificate in ADFS.
Error 2: Verify that both servers have synced clocks server Sisense and ADFS.
#4 Issue: For a new user: after a successful login into ADFS Sisense redirects to the login page, but the user was created in Sisense app. Next login through ADFS successful
Investigation:
- Verify Sisense logs
- Check Admin page with Rest API, version 0.9:
- Run the GET /branding API call:
 Copy the result you get, and remove all parameters which their values are “string” or wrong path, for example:
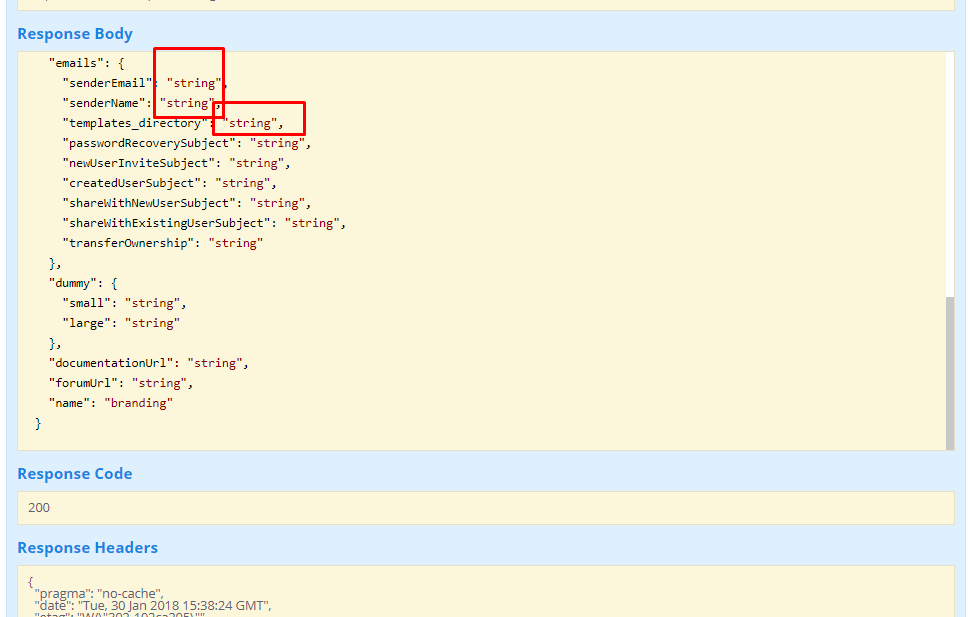
Case: Sisense branding was saved with incorrect paths to the templates or any other sources
Solution:
After removing/fixing paths, paste it in the body of the POST /branding API call and run it:

Updated 03-02-2023
intapiuser
Admin
Joined December 15, 2022